Frost and Kretsch Plumbing

Author name: Writer

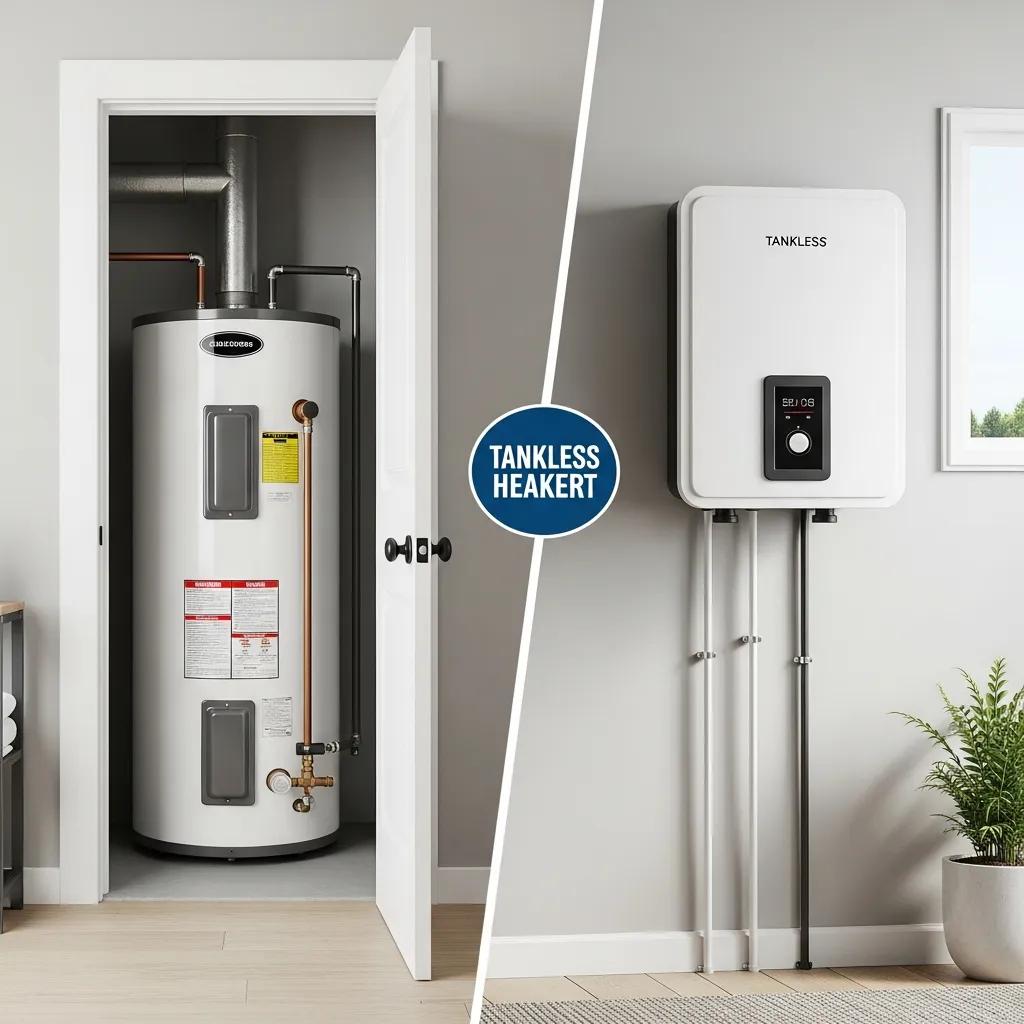
Water heater with sediment buildup illustrating causes of inefficiency

Water Heater Sediment Buildup: Causes and Removal

Water heater sediment: causes, signs, and professional removal for dependable hot water Sediment in a water heater is the build-up of mineral scale and particles—mostly calcium carbonate and magnesium—that settles in tanks and heat exchangers. Left unchecked, these deposits lower efficiency and shorten the life of your equipment. This guide helps homeowners and building managers spot early warning signs, weigh the risk, and pick the right fix—whether that’s a routine flush or professional descaling. You’ll learn why sediment forms, how it reduces performance, and what to do for gas, electric, and tankless systems. We cover the chemistry (hard water and heat), part wear (anode rods and dip tubes), symptom mapping (noise, less hot water, element failure), and practical DIY versus pro decision points. We also outline the professional flushing and descaling steps, when to call a licensed tech, and sensible maintenance like anode checks and water softening. Keywords such as flush water heater, sediment removal, water heater flushing, and water heater descaling are used here to guide practical next steps. What causes sediment buildup in water heaters? Sediment forms when dissolved minerals and tiny particles come out of heated water and settle on the tank bottom or inside heat exchangers. These layers act as insulation, trap water, and reduce heat transfer. The main chemical driver is that calcium and magnesium become less soluble at higher temperatures and form solid carbonates. Corrosion bits from internal parts and dirt from the supply can add to the problem. Knowing that both water chemistry and equipment condition play a role makes it clear why prevention involves both testing water and keeping parts in good shape. Common sediment sources and attributes: Source Characteristic Typical Impact Hard water Main minerals: calcium & magnesium Forms calcium carbonate scale that settles Corroding anode rod State: corroded or intact Produces rust particles and accelerates deposits Municipal changes Events: pipe work or flushing Introduces sand/silt that settles in tank This table shows how different sources produce different deposits, which affects how you remove them and what preventive steps work best. How does hard water contribute to mineral deposits? Hard water speeds up deposit build-up because higher levels of calcium and magnesium drop out of solution when the water is heated, forming insoluble carbonates that settle on the tank floor and heating surfaces. Each heat cycle concentrates more solids and thickens those layers—so homes with harder water need to flush more often. You might notice scale on fixtures, shorter element life, or the need for more frequent maintenance. Local water quality data often show higher element failure and efficiency loss where water is moderately to very hard, so use that information to set your maintenance schedule. Simple fixes include regular flushing or adding a water softener to reduce mineral load. What role does anode rod degradation play in sediment formation? The anode rod is a sacrificial part that corrodes to protect the tank’s steel shell. When it degrades, corrosion particles add to tank sediment. A good anode rod slows metal leaching and delays tank corrosion; a worn rod leaves behind rust and metallic particles that mix with mineral scale, increasing insulation and abrasive wear. Inspect and replace the rod on schedule—signs to watch for include heavy pitting, a noticeably thinner rod, or foul‑smelling hot water. Regular anode care reduces corrosion-derived sediment and helps avoid follow-on problems. What are the common symptoms and effects of sediment buildup? Sediment shows up as popping or rumbling noises, less available hot water, higher energy bills, and faster component wear. Deposits trap water against heat sources, encourage localized boiling, and form crusts that block heat transfer—these mechanisms lead to the symptoms homeowners notice. Below is a quick symptom-to-mechanism table to help you match what you hear or see with likely causes and decide whether to flush or call a pro. Symptoms mapped to mechanisms: Symptom Mechanism Resulting Issue Rumbling or popping Boiling of trapped water under sediment Audible noise and potential tank stress Reduced hot water supply Sediment reduces effective tank volume Perceived lower capacity and shorter hot cycles Element failure / high energy Insulating layer increases heat time Higher energy use and burned-out elements This table links what you observe to the underlying problem and why acting early prevents bigger damage and waste. How does sediment cause noisy water heater operation? Noise happens because sediment on the bottom traps pockets of water that heat to boiling and then release steam in bursts, producing rumbling or popping. Left long enough, those pressure changes can stress the tank and fittings. If the sounds persist or grow louder they usually point to moderate or severe buildup and often come before element failures or leaks. Listen during a heating cycle—if noise doesn’t ease after a basic flush, you likely need deeper descaling or a professional inspection. Treating noise as an early warning saves time and money. What impact does sediment have on hot water supply and efficiency? Sediment acts like an insulating blanket, reducing heat transfer from burners or elements to the water. The system runs longer to reach temperature, which raises energy use and reduces available hot water for back‑to‑back uses. Deposits also take up usable tank volume and create cold pockets, so a tank that once worked fine may suddenly fall short. Over time, increased cycling and overheating wear out elements, burners, and thermostats. Manufacturer guidance and studies show heavy sediment can cut efficiency noticeably—professional descaling often restores much of that lost performance. How can professional water heater flushing and descaling services help? Professional flushing and descaling remove settled minerals and corrosion by‑products using tools and techniques beyond a standard homeowner drain-and-flush. That work restores heat transfer, quiets noisy units, and extends service life. Pros follow safety checks, isolate gas or power, perform controlled draining, use mechanical agitation or high-flow rinsing, and apply chemical descalers when needed for tankless or confined heat exchangers. The result: better efficiency, restored hot water capacity, a component inspection, and a lower risk of premature failure when combined with anode checks

Water Heater Sediment Buildup: Causes and Removal Read More »

Homeowner inspecting plumbing for water leak prevention

Essential Water Leak Prevention Tips for Homeowners

Protect Your Home: Essential Water Leak Prevention Tips for Homeowners Stopping leaks before they start comes down to spotting weak points in your plumbing, appliances, and building envelope — then taking simple, targeted steps to fix them. This guide walks you through practical maintenance routines, detection options, seasonal prep for Michigan weather, and clear warning signs that mean it’s time to call a pro. Frost & Kretsch Plumbing serves Grosse Pointe and nearby Michigan communities with local inspections, repairs, free estimates, and 24/7 emergency response so homeowners can act quickly when prevention or repairs are needed. Read on to learn the most common leak sources, easy checks you can do, recommended detection systems for different homes, seasonal tips for our climate, and how to spot hidden leaks so you know when to contact a licensed technician. Expect checklists, device comparisons, and straightforward tables showing what you can handle yourself and what’s best left to a professional. What Are the Most Common Sources of Water Leaks in Homes? Leaks most often start at aging supply lines, worn fixtures, appliance connections, water heaters, and sewer or drain lines — and each shows different signs. Corroded supply lines and loose joints usually cause slow drips or stains. Fixtures and rubber hoses can fail suddenly and flood floors, while washing machines and dishwashers commonly leak at hose fittings. Water heaters may show pooled water at the base from tank corrosion or fail at valves, and sewer line cracks or blockages can cause backups and unpleasant odors that need immediate attention. Knowing these likely sources helps you prioritize inspections and schedule repairs quickly. When a repair is more than a quick tightening or hose swap, licensed technicians can run diagnostics and perform minimally invasive repairs to fix the underlying problem. The next section explains how pipes, fixtures, and appliances typically fail so you can catch problems early. How Do Pipes, Fixtures, and Appliances Contribute to Water Leaks? Pipes, fixtures, and appliances fail over time because seals wear, fittings loosen, and materials degrade. Older galvanized or supply lines can corrode from the inside and develop pinhole leaks. Faucets often drip from worn cartridges or seals, and rubber appliance hoses can crack or burst after years of movement and pressure. Check under sinks, behind appliances, and along visible supply lines for corrosion, moisture, or mineral buildup — and feel for dampness after heavy use. Replacing rubber hoses with braided stainless steel lines and tightening visible fittings are smart DIY fixes. If leaks keep happening, appear in multiple places, or are behind walls, call a professional: concealed problems often need diagnostic tools and targeted repairs to avoid structural damage. Understanding these common failure modes leads naturally into how water heaters and sewer lines raise separate risks. What Role Do Water Heaters and Sewer Lines Play in Leak Risks? Water heaters and sewer lines each pose different leak threats. Water heaters can leak from a corroded tank, faulty fittings, or a failing pressure-relief valve — pooled water at the heater base often signals tank corrosion and replacement. Regular flushing reduces sediment that speeds corrosion; some valve or fitting issues can be serviced. Sewer lines can crack, be invaded by roots, or shift and cause slow leaks or backups. Signs include recurring slow drains, gurgling fixtures, and sewage odors in basements. Sewer problems require camera diagnostics and professional remediation because of health risks and the potential need for trenching or targeted repairs. Timely maintenance and professional evaluation stop small leaks from becoming major water damage. When you need help, Frost & Kretsch Plumbing provides licensed, insured technicians who use targeted diagnostics and minimally invasive repairs. How Can Homeowners Perform Preventative Plumbing Maintenance? Preventative plumbing maintenance mixes regular inspections, simple DIY tasks, and occasional professional services to catch small problems early. A good routine includes visual checks of exposed pipes and fittings, testing shut-off valves, monitoring water pressure, and inspecting appliance hoses and drains. Doing these tasks monthly to seasonally cuts down on surprise failures. Many basic items are DIY-friendly, but things like pressure regulator adjustments, full water heater replacement, or sewer camera inspections are safer with a licensed pro. Below is a concise checklist you can follow to prioritize tasks and know when to call for help. This monthly-to-annual maintenance checklist helps homeowners stay on top of plumbing health: Inspect visible pipes and fittings: Look under sinks and around appliances for corrosion, moisture, or mineral buildup. Check appliance hoses and connections: Replace rubber hoses every 5–7 years or sooner if they’re cracked or soft. Test shut-off valves and the main shut-off: Make sure valves move smoothly and fully stop water when closed. Doing these checks reduces unexpected failures and makes any professional service quicker and clearer by giving technicians useful observations. Regular maintenance also helps you see when a task is beyond DIY scope and requires professional tools or licensing. Before the table below, note which maintenance tasks are safe to do yourself and which are best handled by a professional to protect safety and long-term system integrity. Maintenance Task Recommended Frequency DIY or Pro Recommended Visual pipe inspection (supply lines, joints) Monthly DIY Appliance hose replacement (washing machine/dishwasher) Every 5–7 years DIY Water pressure check and regulator inspection Annually Pro recommended for regulator work Water heater flush and TPR valve test Annually Pro recommended for full service Sewer camera inspection after repeated backups As needed / after issues Pro required This table makes it clear which tasks you can reasonably do and which need professional tools or licensing. The next section explains inspection techniques, including how to use your water meter to find hidden leaks. What Routine Inspections and Checks Help Prevent Leaks? Routine checks focus on what you can see and easy functional tests, plus monitoring usage for odd patterns. Monthly, look under sinks, around toilets, behind appliances, and near the water heater for damp spots, stains, or drips — take notes or photos to track changes. Do a water meter test by ensuring no water is

Essential Water Leak Prevention Tips for Homeowners Read More »

Family ensuring natural gas safety in a cozy home environment with a gas stove and carbon monoxide detector

Natural Gas Line Safety in Your Home

Natural Gas Line Safety for Your Home: Practical Tips and Trusted Professional Help Keeping your natural gas lines safe starts with knowing how gas travels from the utility to your appliances, how leaks or ventilation problems happen, and what to do quickly to protect people and property. This guide breaks down the main risks — including gas leaks and carbon monoxide (CO) — and gives clear, practical detection, prevention, and emergency steps you can use right away. You’ll learn how to spot early warning signs, what to do in an emergency, where to place CO detectors and how to ventilate properly, and when routine inspection and maintenance are needed. We also cover appliance-specific safety practices, why calling 811 before digging matters, and when licensed professionals should handle leak detection and repairs. Throughout, the goal is simple: give homeowners easy, actionable guidance and a straightforward option to schedule professional inspections or repairs when needed. How can you detect a natural gas leak early? Detecting a natural gas leak depends on your senses, obvious signs around the home, and, when required, professional tools that confirm and locate leaks. Natural gas itself is odorless, but utilities add mercaptan so leaks smell like rotten eggs. Listen for hissing, watch for dead vegetation near buried lines, and follow up with a pro if anything looks or smells wrong. Early detection lowers ignition and health risks and speeds repairs—keeping people and property safer. Below we list common signs, how to check them, and the immediate actions to take if you suspect a leak. What are the common signs and symptoms of a gas leak? Know the sensory and environmental signals that usually point to a gas leak so you can act fast. The most common sign is a persistent rotten-egg smell from mercaptan added to natural gas, though strong cooking odors or chemicals can mask it. You might hear a hissing or whistling sound near a meter, pipe, or appliance. Outside, bubbling in standing water or dead vegetation over a buried line are red flags. Low-level exposure can cause headache, dizziness, or nausea before you notice any smell or sound — if that happens, move outdoors right away for fresh air. Recognizing these signs helps you decide when to evacuate and call emergency services or schedule a professional inspection. Intro to symptom/detection comparison table: The table below summarizes common symptoms, the simplest detection methods you can use at home, and the immediate actions to take for each sign. Symptom or Sign Detection Method Recommended Immediate Action Rotten-egg odor (mercaptan) Smell inside the house, near an appliance, or outside Leave the building, avoid anything that could spark, and call 911 or your gas utility from a safe distance Hissing or whistling sound Look toward the pipe, meter, or appliance area without touching anything Evacuate the area and report the exact location and sound to the utility and a licensed technician Dead vegetation or bubbling in puddles Visual check near the meter or along the buried service line Keep clear of the spot, contact the utility, and schedule a professional locate and repair Pilot light outages or burner irregularities Watch appliances while they operate Turn off appliance gas only if it’s safe to do so, ventilate the area, and call a technician This comparison shows which quick home checks can signal a gas leak and the immediate steps to take before professionals arrive. Knowing how smell, sound, sight, and symptoms combine helps you prioritize evacuation and reporting. Why is professional gas leak detection crucial? Professional detection bridges the gap between homeowner observation and a safe, confirmed diagnosis using specialized tools and trained technicians. Licensed techs use calibrated gas detectors, combustible-gas meters, and leak correlators to find small or hidden leaks that you can’t smell or see. They follow safety protocols and local codes to contain hazards, and they provide documentation utilities, insurers, or contractors can use to coordinate repairs or claims. Professional service also prevents risky DIY attempts that could make a leak worse or cause ignition. If you notice anything unusual, a prompt professional check reduces uncertainty and ensures repairs meet safety standards. What immediate actions should you take during a gas leak emergency? When you suspect a gas leak, fast, calm action protects lives and property: get everyone out, avoid anything that could spark, call emergency responders and your gas utility from a safe distance, and don’t go back inside until professionals say it’s safe. The priority is to remove ignition sources and get people to fresh air, then let authorities and licensed technicians shut off and secure the supply and make repairs. The steps below explain what to do and what to tell dispatchers and utility operators to speed a safe response. How do you safely evacuate and report a gas leak? A safe evacuation is orderly, accounts for everyone (including pets and people with mobility needs), and ends with a clear report to 911 and the gas utility from a safe location. Only shut off gas at appliance valves if you can do so without exposing yourself to odor or danger; otherwise, leave immediately by a designated exit and avoid basements or enclosed stairwells where gas can collect. Once outside, call 911 and your gas utility and give them your address, what you smelled or heard, any appliances involved, and whether anyone has symptoms. Wait for utility or licensed technicians to declare the area safe before going back inside so they can isolate and verify the leak properly. What are the dangers of using electrical devices during a leak? Using electrical devices during a gas leak can create the spark that ignites a flammable gas-air mix. Even flipping a light switch, plugging in a device, or running a garage door opener can produce an arc. Because certain gas concentrations are explosive when an ignition source is present, avoid all electrical interactions until you’re outside and the area is cleared. Use a mobile phone only from a safe outdoor distance. Understanding this risk explains

Natural Gas Line Safety in Your Home Read More »

Professional plumber repairing an outdoor faucet in a residential garden

Outdoor Faucet (Hose Bib) Repair and Installation Services

Outdoor Faucet Repair & Installation in Grosse Pointe — Trusted Solutions for Homes and Businesses Outdoor faucets — also called hose bibs or sillcocks — provide water for watering, washing, and seasonal tasks while helping protect interior plumbing from freeze damage. This guide walks through how outdoor faucets work, the common types you’ll see around Grosse Pointe, and practical steps to diagnose and fix leaks, drips, frozen spigots, and low-pressure problems. Whether a simple packing-nut tweak will fix it or a professional replacement or frost‑free upgrade is the smarter long-term choice, you’ll find clear guidance here. We also outline the local professional services available — from leak detection and anti‑siphon fixes to commercial backflow protection — and offer realistic cost ranges and decision points for repair versus replacement. Read on for straightforward how‑to steps, side‑by‑side comparisons, and simple maintenance checklists that answer searches like “hose bib repair,” “frozen hose bib,” and “outdoor faucet repair Grosse Pointe” with locally relevant advice. What Are Outdoor Faucets and Hose Bibs? Understanding Their Role and Types Outdoor faucets and hose bibs are the exterior valves that control water from a building’s supply line to hoses and outdoor equipment. They’re the connection between your indoor plumbing and outdoor water use, and their design affects freeze resistance, flow, and backflow protection. Choosing the right type and installing it correctly reduces the risk of freeze-related pipe bursts, prevents cross-contamination, and extends the life of the fixture in Michigan’s climate. Knowing the basic components and common models helps homeowners pick the right option and spot when a repair or upgrade is needed. What is a Hose Bib and How Does It Work? A hose bib is a threaded exterior spigot attached to a supply line that uses an internal valve assembly to stop or allow water flow, usually operated by an external handle. Inside you’ll find a valve stem, packing nut, seat washer (or rubber seal) and the handle — together they compress or release the seal to stop or let water through. Most wear shows up at the seat washer and valve stem where repeated use, mineral buildup, or freeze damage breaks down seals and causes leaks. Recognizing these parts and common failure points helps homeowners troubleshoot basic problems and lets technicians know when more extensive repairs or replacement are required. What Types of Outdoor Faucets Are Commonly Installed? Outdoor faucets come in a few common styles, each suited to different climates and uses. Picking the right type reduces maintenance and winter risk. Typical options include standard sillcocks for mild areas, frost‑free hose bibs for cold climates, anti‑siphon models for backflow protection, and heavy‑duty wall hydrants for commercial needs. Choosing based on freeze resistance, required flow, and local code will minimize future problems and service calls. Standard sillcocks — simple and cost‑effective for mild climates when an indoor shutoff is available. Frost‑free hose bibs — extend the valve into the heated envelope to prevent freezing. Anti‑siphon hose bibs — include vacuum breakers to protect potable water from contamination. Wall hydrants and commercial fixtures — built for higher flow and heavier use at business sites. Start by matching fixture type to how you use water and the local climate — that guides maintenance and installation choices for long‑term reliability. How to Identify and Fix Common Outdoor Faucet Problems Spotting outdoor faucet problems starts with noting symptoms and doing a few safe checks that separate simple fixes from issues needing a plumber. Typical signs include dripping at the spout, leaks where the faucet meets the wall, no water at the outlet, low flow, or a valve that won’t shut off. A straightforward diagnostic routine — shut off the interior supply valve, remove hoses, and inspect seals and packing — narrows down likely causes and avoids unnecessary parts replacement. These checks help you decide whether to DIY or call a licensed technician to prevent water damage or code issues. Check the shutoff: Make sure the interior shutoff feeding the outdoor faucet is fully closed before blaming the exterior spigot. Remove hoses: Disconnect hoses and confirm there are no kinks or blockages restricting flow. Inspect external leakage: Note where water appears (spout, wall, handle) to identify whether the valve stem, packing nut, or supply line is failing. These quick steps help prioritize repairs and show when professional leak detection or replacement is the safer move to protect your home. What Causes a Leaky or Dripping Outdoor Spigot? Most dripping spigots are caused by worn seals, damaged valve stems, corroded seats, or a loose packing nut that lets water bypass the valve. Mineral buildup and corrosion speed up wear on rubber washers and metal seats, and repeated freeze‑thaw cycles can warp sealing surfaces or crack stems. Simple DIY fixes include replacing seat washers or tightening the packing nut, but ongoing drips after seal replacement often point to deeper corrosion or a full faucet replacement. If leaks show at the wall penetration or inside the structure, call a pro to check the supply line and prevent interior water damage. How Can Frozen Hose Bibs Be Thawed and Prevented? If a hose bib freezes, start by shutting off the indoor supply valve and opening the outdoor spigot to relieve pressure, then apply gentle heat to the frozen area — never use open flames or overly hot tools. Stop if you see cracking or if thawing doesn’t work, and call a plumber. For long‑term prevention, winterize by disconnecting hoses and draining lines, add insulation on exposed plumbing, or upgrade to a frost‑free hose bib. Those steps greatly reduce the risk of burst pipes and costly repairs after a cold snap. What Professional Outdoor Faucet Repair Services Does Frost and Kretsch Plumbing Offer? Our professional services cover everything from targeted valve repairs to full faucet replacement and commercial upgrades. Common offerings include leak detection (visual and pressure testing), valve stem and packing replacement, anti‑siphon/vacuum breaker servicing, frost‑free hose bib installation, and emergency repairs for freeze‑related failures. Technicians assess access, interior shutoffs, and code requirements to

Outdoor Faucet (Hose Bib) Repair and Installation Services Read More »

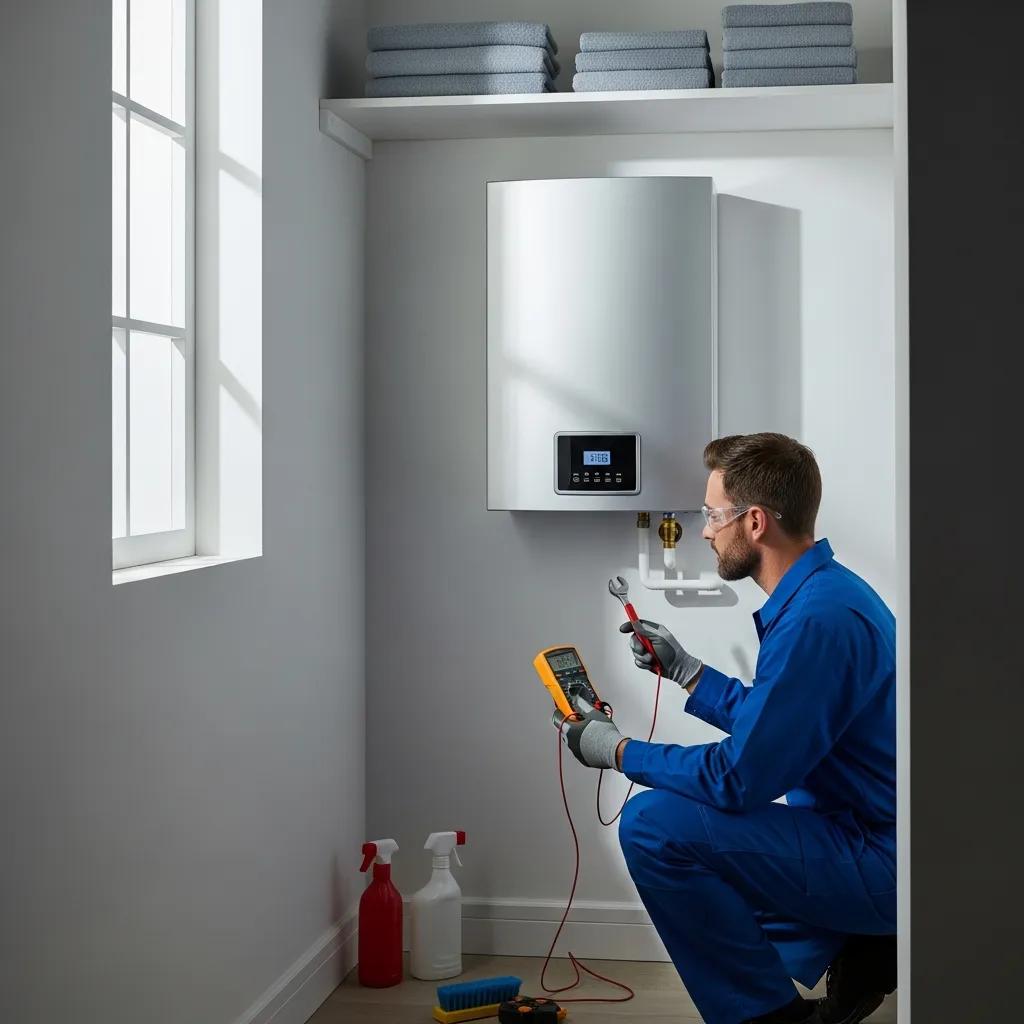
Modern water heater installation with technician inspecting unit in a home setting

Water Heater Repair & Installation in Warren, MI

Water Heater Repair & Installation in Warren, MI — Reliable Hot Water, Done Right A broken water heater throws off your whole day — cold showers, laundry piled up and the risk of leaks that damage floors and finishes. This guide walks Warren homeowners and business managers through diagnosing common problems, estimating replacement costs, and choosing the right system. You’ll learn the usual warning signs (leaks, rusty water, noisy tanks), how costs differ for tank and tankless units, the advantages of tankless systems, basic maintenance to extend service life, and what commercial customers should expect. Practical checklists and clear next steps make it easier to decide when to repair, replace, or call a pro. What Are the Signs You Need Water Heater Repair in Warren, MI? Water heater problems usually show up the same way — and catching them early saves energy and prevents costly damage. Look for no hot water, steady drips or pooling around the tank, brown or discolored water, loud banging or popping noises, and temperature that goes from hot to cold while you’re using it. A few basic safety checks—confirming circuit breakers, checking the pilot light on gas models, and scanning for visible corrosion—will often speed diagnosis and help your technician arrive ready to fix it. Spotting these signs also helps you decide whether a repair is temporary or replacement is the smarter long-term choice. How to Identify Common Water Heater Problems Like Leaks and No Hot Water Leaks and a lack of hot water are the most common complaints and point to different causes. Pooling usually means a failing tank, a corroded drain valve, or a loose connection; no hot water on electric heaters often means a bad heating element or a tripped breaker. Quick homeowner checks: look for corrosion or dampness around the tank base, test the water heater breaker at your panel, and make sure the pilot light is lit on gas units. If your tank is noisy or producing less hot water, sediment may be the cause — a tank flush can sometimes restore performance and reveal whether parts need replacing. These simple checks show whether it’s time for a professional visit. If a problem looks bigger than a few homeowner checks, the next step is knowing when to call for emergency service and which safety actions to take first. When to Call Emergency Water Heater Repair Services in Warren Some situations are urgent because they risk property damage or safety. Call for emergency help if you see a large, uncontrolled leak flooding an area, smell gas near a gas-fired heater, or detect sparks or burning odors from electrical hookups. Before help arrives, shut off the cold-water inlet valve, cut power at the breaker for electric units, and evacuate and call emergency services if you smell a strong gas odor. Frost & Kretsch Plumbing Inc. provides 24/7 emergency response for these situations and can stabilize the issue to prevent more damage. How Much Does Water Heater Installation and Replacement Cost in Warren, MI? Costs vary by system type and job complexity. Knowing the main cost drivers helps you budget for a Warren-area installation or replacement. Typical costs include the unit price, labor, permits, disposal of the old unit, and any necessary plumbing, venting, or electrical work. Conventional tank heaters usually cost less up front but may cost more to operate over time. Tankless systems carry a higher initial price but can save energy and last longer. Understanding where the money goes helps you weigh immediate expense against lifetime value. Key factors that influence the final price are the model and capacity you choose, how easy the unit is to access, whether venting or electrical service must be upgraded, local permit fees, and removal/disposal of the old water heater. Labor rates reflect the scope of work and any code upgrades required. Many local providers offer free estimates and transparent, line-item quotes so you know what to expect. This table summarizes typical installation and replacement ranges and highlights major cost drivers to help with budgeting. System Type Typical Installation Cost Range Primary Cost Drivers Conventional Tank (gas/electric) $800–$1,800 Unit size, labor, disposal, permit fees Tankless (gas/electric) $1,500–$3,500 Unit capacity, venting/electrical upgrades, labor Hybrid / Heat Pump $1,800–$3,500 Complexity, electrical upgrades, space and ducting Generally, tankless systems require a larger upfront investment for equipment and retrofits, while tank models are cheaper to buy and install. When choosing, factor in expected lifespan, energy use, and your household’s hot water needs. Factors Affecting Water Heater Installation and Replacement Prices Several variables determine the overall cost. Unit selection is primary: bigger tanks and higher-GPM tankless units cost more and may require upsized gas lines or electrical service. Tight access can add labor time, and older piping or venting may need replacement to meet current codes. Knowing these factors helps you anticipate possible extra expenses during installation. These considerations naturally lead to comparing tank and tankless options so you can weigh short-term cost against long-term savings and reliability. Comparing Costs of Tank vs. Tankless Water Heaters in Warren Tank and tankless systems differ in upfront cost, operating expense, and useful life. Tank units are usually less expensive to buy and install and are easier to swap into existing setups. Tankless units cost more initially but usually run more efficiently and often last longer with proper care. Maintenance differs too: tanks need regular flushing and anode checks, while tankless units require descaling and heat-exchanger care in hard-water areas. Attribute Tank Water Heater Tankless Water Heater Typical Initial Cost Lower ($800–$1,800) Higher ($1,500–$3,500) Lifespan ~8–12 years ~15–20+ years Energy Use Standby losses, higher operating cost On-demand, higher efficiency Maintenance Flushing, anode checks Descaling, flow sensor maintenance This side-by-side view helps you pick the best fit for household size and simultaneous hot water use, balancing upfront cost against long-term savings. What Are the Benefits of Tankless Water Heaters in Warren, MI? Tankless heaters heat water on demand, eliminating standby heat loss and often lowering energy bills for homes with moderate hot-water

Water Heater Repair & Installation in Warren, MI Read More »

What is a P-Trap? Function and Maintenance

P‑Traps: How They Work, How to Maintain Them, and When to Call a Pro for Your Grosse Pointe Home A P‑trap is the curved pipe under sinks and many fixtures that holds a small amount of water to block sewer gas and catch debris before it moves down the drain. For Grosse Pointe homeowners, a working P‑trap keeps your home smelling fresh, protects indoor air quality, and helps avoid bigger — and more expensive — sewer problems. This guide walks you through how a P‑trap creates its water seal, the common materials and sizes, easy maintenance you can do yourself, troubleshooting tips, how P‑traps differ from older S‑traps, and clear signs it’s time to call a licensed plumber. We also explain the local service options with Frost and Kretsch Plumbing so you know who to call for repairs or emergency help. How Does a P‑Trap Function to Prevent Sewer Gas and Protect Your Home? A P‑trap works by keeping a small volume of water in its bend. That standing water forms a physical barrier — the trap seal — that blocks sewer gases while still letting wastewater flow away. The trap’s shape, trap arm, and the venting system all work together to keep pressures balanced and prevent the seal from being siphoned dry. The trap also captures heavier debris like hair and grease so those solids don’t travel into the main drain. Knowing how the trap seal and vents interact helps you keep the system working and avoids odors or gas seepage. P‑traps are only one part of your drainage system. If vents are clogged or a trap arm is too long or sloped wrong, the seal can be lost to siphoning or backpressure. Simple habits — running water regularly and keeping grease and large solids out of the drain — help preserve the seal. If you still notice odors or pressure issues after basic steps, it often points to a vent or sewer‑line problem that needs professional inspection and possibly a camera check. Key P‑trap functions at a glance: Block sewer gas — the water seal keeps gases out of living areas. Catch debris — heavy particles settle in the U‑bend to protect the sewer line. Balance pressure — the trap arm and venting prevent siphoning and keep flow steady. Taken together, these roles make the P‑trap a simple but essential part of home plumbing. A little routine care goes a long way toward protecting your plumbing and your family’s comfort. What is the Water Seal and How Does It Block Sewer Gas? The water seal — often called the trap seal — is the depth of water sitting in the P‑trap’s curve. That water column physically stops sewer gases such as hydrogen sulfide and methane from entering your home. The seal needs only a small amount of water to work, but it can fail if the trap dries from evaporation, if a fixture sees little use, or if improper venting siphons the water away. To prevent a dry trap, run water occasionally, install a trap primer where needed, and have vents checked if siphoning keeps happening. A broken trap seal is a common cause of drain odors and is usually easy to verify: look for water in the trap and consider how often the fixture is used. Restoring the seal often means pouring water down the drain and addressing the root cause — whether that’s evaporation, venting issues, or something else. If the seal keeps failing despite simple fixes, call a licensed plumber to inspect vent integrity and other system components. How Does the P‑Trap Trap Debris to Prevent Plumbing Clogs? The P‑trap slows flow in its U‑shaped bend so heavier particles — hair, grease, coffee grounds, food scraps — settle out and collect at the low point. That’s helpful because it keeps large solids from moving into the sewer line, but it also makes the trap itself the most likely place for a clog. Periodic cleaning removes the accumulated debris, restores flow, and prevents odors from decomposing material. Check and clean traps more often in kitchen sinks or bathroom vanities that regularly handle solids and grease. If debris returns quickly after cleaning, it can signal an upstream issue like a broken trap arm, incorrect slope, or a partial line blockage. A camera inspection or professional drain cleaning can locate those problems and stop the cycle of recurring clogs that simple trap cleaning won’t solve. What Are the Common Types and Materials of P‑Traps Used in Plumbing? P‑traps come in several materials and styles to match fixture type, budget, and local practice. Common options include PVC, ABS, brass, and polypropylene. Each has trade‑offs in durability, corrosion resistance, appearance, and cost. Where a trap is visible you might choose brass for the finish; for most under‑sink work PVC or ABS gives a reliable, low‑cost solution. Professional installers consider where the trap sits, the type of water it sees, and how easy future service should be when recommending a material. Quick comparison of common P‑trap materials to guide replacement or repair choices: Material Durability Typical Cost Corrosion Resistance Common Uses PVC Durable for routine residential use Low High (non‑metallic) Bathroom and kitchen under‑sink ABS Similar to PVC, better impact resistance Low–Mid High Exposed areas or colder environments Brass Very durable with attractive finish High Excellent (varies by alloy) Visible plumbing, premium fixtures Polypropylene Lightweight and chemical‑resistant Low–Mid High Lab sinks, specialized installations PVC and ABS meet most residential needs thanks to low cost and corrosion resistance; brass is chosen where appearance and longevity matter. Polypropylene is useful where chemical exposure is a concern. Installers also weigh connection type and ease of future service when advising on materials. What Are the Pros and Cons of PVC, ABS, Brass, and Polypropylene P‑Traps? PVC and ABS are affordable, resist corrosion, and are easy to replace — they’re the go‑to for most homes. ABS offers a bit more impact resistance. Brass lasts a long time and looks good under exposed sinks but costs

What is a P-Trap? Function and Maintenance Read More »

Grease Trap Installation, Cleaning, and Maintenance for Restaurants

Complete Grease Trap Installation, Cleaning & Maintenance for Grosse Pointe Restaurants Grease traps and interceptors separate fats, oils and grease (FOG) from wastewater so drains and sewer lines stay clear and kitchens stay open. This guide shows how the right installation, a regular cleaning schedule, and proactive maintenance keep restaurants in Grosse Pointe running—reducing downtime, avoiding fines, and extending the life of your plumbing. You’ll learn what FOG is, how it builds up, which trap types suit different kitchens, why hydro jetting and scheduled pumping matter, and how Michigan rules affect compliance. We also cover simple maintenance plans, common problems and repairs, and how to choose a qualified commercial plumbing partner. Where relevant, we note local services from Frost & Kretsch Plumbing so managers can quickly connect operational needs with licensed, insured support and 24/7 emergency response. Why professional grease trap management matters for restaurants Left unchecked, FOG solidifies in drains and municipal sewer mains, causing backups and costly interruptions. A professional program uses correctly sized traps, scheduled pumping, and certified cleaning to remove buildup before it becomes a problem. The benefits are simple and practical: less downtime during rush periods, predictable maintenance expenses, and clear records for inspectors. Below we break down what FOG is, how it affects operations, and the compliance and cost impacts so you can prioritize effective control. FOG—fats, oils and grease—comes from cooking oil, food scraps, dairy and sauces. These materials cling to pipe walls, trap solids and gradually narrow flow paths. Over time they congeal into blockages that cause slow drains, backups into sinks and floor drains, extra cleanup and inspection headaches. Knowing how FOG behaves helps you choose the right removal strategy to reduce clogs and odors. Restaurants need documented pumping records, disposal manifests and a planned maintenance schedule to satisfy health and sewer inspections. Certified technicians minimize the risk of improper cleaning that can damage plumbing, and professional service ties into corrosion prevention and responsible wastewater handling. Local option: Frost & Kretsch Plumbing serves Grosse Pointe restaurants with commercial grease trap services. Our licensed, insured technicians offer transparent pricing, emergency response and help with scheduling and compliance when you need it. Professional grease trap management keeps restaurants running by: Preventing sewer backups and the costly downtime they cause.Meeting regulatory expectations and lowering inspection risk.Reducing long-term repair and replacement costs through early FOG removal.Controlling odors and supporting kitchen sanitation standards. How expert grease trap installation benefits your restaurant Correct installation matches trap capacity, placement and type to your kitchen’s flow rates and menu-driven FOG load so the system captures grease effectively and needs less frequent service. Proper installs make sure inlet and outlet baffles are oriented correctly, access covers are serviceable, and vents allow safe pumping and inspection. Right sizing reduces hydraulic short-circuiting and simplifies disposal documentation—requirements many municipalities enforce. Below is a quick comparison of common trap types to help facilities managers match a solution to kitchen volume and space limits. Introductory comparison table for grease trap types and attributes: Grease Interceptor Type Characteristic Typical Use Case Passive grease trap Small footprint, gravity-based baffles Low-volume prep stations or tight indoor spaces Hydro-mechanical trap Compact, internal separation devices Medium-volume restaurants with indoor installs Automatic grease interceptor Continuous skimming of FOG High-volume kitchens that need automated removal In-ground interceptor Large capacity, outdoor installation High-throughput sites or multi-tenant complexes Proper sizing lowers overflow risk and meets required hydraulic retention time for separation. Correct placement improves access for scheduled pumping and inspections, cutting labor time and disruption. Following code at installation avoids rework during health or building inspections and prevents expensive retrofits. Those benefits flow into the practical installation steps: load analysis, trap selection and permit coordination, which we discuss next. When licensed crews install your system, the work includes permitting and testing to confirm code compliance. Frost & Kretsch Plumbing sends trained technicians, uses transparent pricing, and leaves the site clean—plus we offer 24/7 support when immediate action is required. Which types of grease traps work best for commercial kitchens? Choosing the right trap depends on FOG volume, available footprint and maintenance access. Passive traps are cost-effective for small operations but need frequent pumping; hydro-mechanical units save space for medium flows; automatic interceptors reduce manual handling for heavy FOG loads; in-ground interceptors handle the largest capacities for big sites. Think about your menu, peak-hour flow and whether indoor or outdoor vaults fit your facility when deciding. Maintenance needs vary: passive traps require regular basket cleaning, hydro-mechanical devices need periodic mechanical service, and automatic interceptors demand scheduled checks of skimming components. Use the guidance above to match trap type to your operation and plan service accordingly. Benefits of regular grease trap cleaning services Regular cleaning reduces blockages, controls odor and creates a paper trail for municipal and health inspections—delivering real ROI through fewer emergencies and less downtime. Routine service keeps baffles, baskets and access covers functional, and proper disposal prevents contamination of municipal systems. Professional service packages commonly include pumping, line inspection and disposal manifests that simplify audits. Below we explain frequency, common methods and why documentation matters for compliance. How often you clean depends on kitchen volume, menu oiliness and trap size. Small cafes may need monthly service; high-volume restaurants often require weekly or biweekly pump-outs. Heavy frying, constant dishwashing and missing pre-rinse screens all increase service frequency. Setting a cleaning cadence based on measured FOG accumulation makes maintenance predictable and avoids surprise closures from overflows. Typical removal methods include manual pumping and hydro jetting—each suited to different buildup levels. Michigan requires pumped waste be hauled and disposed of at licensed facilities to prevent illegal dumping. Common techniques used by professional crews include: Manual pumping and waste removal by certified technicians to extract solids and liquids. Hydro jetting to flush grease from lines and reduce re-adhesion on pipe walls. Scheduled inspections and documentation to demonstrate compliance during health or municipal audits. Combining these methods into a scheduled plan minimizes emergency calls and extends trap life. Frost & Kretsch Plumbing offers maintenance contracts that bundle

Grease Trap Installation, Cleaning, and Maintenance for Restaurants Read More »

Modern kitchen sink with stylish faucet and fresh vegetables, representing kitchen repair and installation services

Kitchen Sink Repair, Replacement, and New Installation Services

Comprehensive Kitchen Sink Repair, Replacement, and New Installation Services in Grosse Pointe We handle everything from fixing stubborn leaks and clearing slow drains to installing new basins and faucet systems during remodels. Homeowners and small businesses in Grosse Pointe commonly run into issues caused by aging pipes, grease buildup, hard-water scale, or mismatched fixtures. Knowing what’s causing the problem and what realistic fixes look like makes it easier to choose between a repair, a replacement, or a full installation. This guide shows how to spot leaks, clear clogs safely, estimate replacement costs by material and labor, and what to expect from a professional installation. You’ll also get material comparisons, a step-by-step installation timeline, and clear advice on when a garbage disposal needs professional attention. Our focus is practical troubleshooting, straightforward cost guidance, and work that meets plumbing codes and quality standards. Read on to learn when a DIY fix makes sense and when it’s time to call a licensed pro to protect your kitchen investment. What Are the Common Kitchen Sink Problems in Grosse Pointe Homes? In Grosse Pointe, typical kitchen sink problems include slow drains and full clogs, ongoing leaks, low faucet pressure, unpleasant odors, and garbage disposal failures. These usually stem from grease buildup, mineral scale from hard water, or aging supply and drain lines. Leaks often show up as stains, damp cabinets, or the sound of running water with fixtures off; clogs commonly start as slow drainage and can become backups if ignored. Older homes with galvanized or cast-iron drain runs are more likely to experience scale narrowing and corrosion, which increases the need for mechanical snaking or hydro-jetting. Catching symptoms early helps you decide whether a homeowner-level fix will do or if a professional is needed to avoid water damage and mold. Here’s a quick, scannable list that names each common problem and a short reason it happens—handy for fast diagnosis and next steps. Leaky faucet or supply line: Drips at the spout or damp cabinet undersides—often from worn washers, O-rings, or loose fittings. Clogged drain: Water pools and drains slowly because grease, food scraps, or hair are trapped in the trap or drain line. Garbage disposal jams or hums: Unit won’t grind and may hum—usually caused by foreign objects or motor overload. Low water pressure at the faucet: Weak flow often from aerator buildup, a partially closed valve, or a constricted supply line. Foul odors: Persistent smells point to trapped organic matter in the P-trap or venting problems. These symptoms point to practical fixes and escalation paths, which we cover next. Knowing where a problem is and how it behaves helps you decide if a simple tightening or a plumber’s visit is the right move. How Do You Identify and Fix Kitchen Sink Leaks? Leaks usually show as visible water, stains, or dampness beneath the sink and may include dripping sounds or pooling around the basin. Start by isolating the source: run the faucet and check around the faucet base, inspect supply line connections (a quick quarter-turn with a wrench often tightens hand-finished fittings), and look at the P-trap and drain flange for loose slip nuts or corrosion. Common DIY fixes include replacing faucet O-rings or washers, tightening compression nuts on supply lines, or applying plumber’s tape to threaded fittings. Most of these repairs require only basic tools—an adjustable wrench, plumber’s tape, and spare washers. If you find water damage behind cabinets, mold, or leaks that continue after basic repairs, call a licensed plumber to locate hidden pipe failures and make repairs that protect structural finishes. Professionals also replace degraded supply lines to code and can advise on mold remediation or cabinet repairs that follow unresolved leaks. What Causes Clogged Kitchen Sinks and How Are They Cleared? Clogs form when grease, coffee grounds, fibrous vegetables, and foreign items build up in the P-trap or further down the drain line, gradually restricting flow until a full blockage forms. Homeowners can often clear early clogs with a plunger, by removing and cleaning the P-trap (use a bucket), or with a handheld drain snake for trap and tailpiece obstructions—these options work well and avoid harsh chemicals. Professional clearing includes powered mechanical snaking for deep obstructions, video inspections to find recurring trouble spots, and hydro-jetting to flush grease and mineral deposits from the whole run. Hydro-jetting is especially effective on older pipes with heavy buildup but should be done by experienced technicians. Repeated use of strong chemical drain cleaners is discouraged—they can damage finishes and pipe materials and complicate later mechanical cleaning. If clogs come back, have a pro check for sewer-line problems or venting issues. The next section covers how replacement costs vary by material and installation complexity—an important consideration when clogs are frequent. How Much Does Kitchen Sink Replacement Cost in Grosse Pointe? Replacement cost depends mainly on sink material and style, whether counters must be modified, any plumbing or disposal upgrades, and local labor rates for licensed plumbers. Key cost drivers include material choice (stainless steel, cast iron, composite granite), countertop cut or reinforcement for heavy sinks, faucet and disposal upgrades, and any supply or drain piping work. Labor gets more complex when installers remove and reinstall countertops, reinforce undermounts, or rework rough-in plumbing—these tasks take extra time and specialized tools. Below is a quick comparison of common sink materials, their key traits, and how each affects lifespan and cost so you can estimate a realistic replacement budget. Material Durability/Style Typical lifespan & cost factor Stainless steel Lightweight, modern—can show scratches 10–15 years; budget-friendly, usually easier and cheaper to install for drop-in or undermount Cast iron (enamel) Classic, very heavy 20–30+ years; higher cost because of weight and need to reinforce countertops Composite granite Scratch- and stain-resistant, premium look 15–25 years; mid-to-high cost, needs precise undermount installation The table shows how material choice shifts both product price and labor time—cast iron often increases installation and reinforcement costs, while stainless options tend to reduce structural work. After weighing these trade-offs, many Grosse Pointe homeowners request an

Kitchen Sink Repair, Replacement, and New Installation Services Read More »

Plumber installing a water heater in a modern kitchen, emphasizing plumbing permits and compliance

Macomb County Plumbing Permits & Inspection Requirements

Macomb County Plumbing Permits & Inspection Requirements: Your Complete Guide to Compliance In Macomb County, plumbing permits and inspections are the official approvals required for most plumbing work. They exist to keep installations safe, meet code, and create a clear record of the work performed. This guide walks you through which jobs usually need a permit, how inspections proceed, typical fees and timelines, the codes that apply, and practical steps to secure approval so homeowners and contractors avoid delays and fines. It’s easy to underestimate how local rules, the Michigan Plumbing Code, and municipal amendments overlap — and how that can cause headaches during remodeling or repairs. We explain inspection types (underground/rough‑in, final, and specialty checks), the permit workflow, and simple prep steps that increase the chances of passing inspections on the first visit. Also included: a quick comparison of common projects, a step‑by‑step permit application table, and clear guidance on when to hire a licensed plumber versus pulling a homeowner permit. If you’d rather let someone handle the paperwork and scheduling, Frost & Kretsch Plumbing offers turnkey permit coordination and inspection scheduling so you can focus on the build. What Are the Essential Plumbing Permit Requirements in Macomb County? Plumbing permits in Macomb County confirm that work follows the Michigan Plumbing Code and any local amendments, protecting health and property. The process is simple in concept: you submit a permit application that describes the scope and plans, the local authority reviews for code compliance, and inspectors verify the work at key stages. Permits reduce safety risks, protect sewer and water connections, and preserve resale and insurance records. Knowing which jobs require a permit helps you avoid enforcement actions and coverage disputes. Use the quick‑reference table below to see common project types and whether a permit is typically needed. Permit triggers and exemptions vary by project—read the examples and local nuances after the table to understand common edge cases and verification steps. Project Type Permit Required? Notes / Examples Water heater replacement Usually yes Changing size or type often requires a permit; new venting or fuel hookups receive closer review Sewer line repair/replacement Yes Any excavation or tie‑in to public sewer typically requires a permit and inspection Fixture replacement (toilets, faucets) Sometimes Single, like‑for‑like swaps are often exempt; multiple fixtures or drain changes usually need a permit Repiping (partial or full) Yes Altering potable water or DWV systems requires permits and staged inspections Sump pump installation Usually yes If it ties into storm or sewer systems or needs excavation, a permit is generally required This table covers common situations. Individual municipalities inside Macomb County may set different thresholds or minor‑repair exemptions, so always check with your local building department to avoid surprises. Which Plumbing Projects Require Permits in Macomb County? Permit requirements depend on scope. New construction, system extensions, or work that changes how the plumbing system functions or connects almost always needs a permit. Those projects can affect venting, backflow protection, drainage slope, and fixture counts, so they must meet code. Examples that typically require permits include sewer line replacement, water service changes, full or partial repiping, and water heater installs that add new venting or fuel connections. Small, visible repairs—like replacing a single faucet or clearing a clog—are often treated as maintenance and may not need permits, but cumulative or concealed changes can push a job into permit territory. If you’re unsure, document the planned work and call the municipal permit office. A quick pre‑application check can prevent costly rework later. How Much Do Plumbing Permits Cost in Macomb County? Permit fees vary by municipality, project type, valuation, and whether the job is residential or commercial—so there isn’t a single flat rate. Fees depend on project valuation, fixture counts, required inspection visits, and any specialty permits (for example, backflow or grease traps). Small residential jobs usually have modest fees; larger repiping or commercial projects cost more because of plan review and inspection complexity. Plan for a small contingency for permit fees when budgeting to avoid surprises. To confirm current rates, check the local building department fee schedule. For complex projects, contractors or permit coordinators can provide fee estimates during planning so you can include them in bids and timelines. How Does the Plumbing Inspection Process Work in Macomb County? Inspections in Macomb County follow staged verification: plan review, staged inspections (underground/pre‑backfill and rough‑in), then a final inspection to confirm safe, code‑compliant operation. Once a permit is approved and posted at the job site, inspectors check work at key milestones to ensure it meets the Michigan Plumbing Code. Staged inspections let officials verify concealed work before it’s covered, which lowers the chance of rework and improves safety. Scheduling and exact procedures vary by municipality, so understanding inspection types and common checklist items helps you prepare and pass inspections smoothly. Below is a comparison table that shows common inspection types, their purpose, and typical checklist items inspectors look for. Inspection Type Purpose Typical Checklist Items Underground/Pre-backfill Confirm buried piping and slopes before backfill Trench depth, pipe bedding, slope, cleanouts, connections Rough-in Verify layout and supports before walls/floors are closed Pipe sizes, venting, slope, fixture stub‑outs, hangers Final Ensure fixtures work and the system is leak‑free Fixture operation, trap seals, water heater setup, backflow protection Special inspections Inspect specialty systems (backflow, grease interceptors) Device location, test results, maintenance access Preparing for each inspection stage protects public health and cuts down on concealed defects. A little preparation ahead of time reduces corrective orders and re‑inspection delays. What Types of Plumbing Inspections Are Conducted? Inspectors perform several types of checks to match construction stages and specialty systems, each with its own focus and pass/fail items. Underground or pre‑backfill inspections confirm that buried piping, slope, and bedding meet code before being covered. Rough‑in inspections verify the piping layout, vents, and supports before fixtures are connected and walls are closed. Final inspections test system operation—checking for leaks, proper fixture function, venting, and required backflow devices—to make sure the installation is safe and sanitary. Special

Macomb County Plumbing Permits & Inspection Requirements Read More »

Homeowner inspecting a toilet with tools for DIY repairs

DIY Toilet Repairs: Fixing Common Toilet Problems

DIY Toilet Repairs for Grosse Pointe Homeowners — Fix Running, Clogged, and Leaky Toilets Running, weak, clogged, or leaky toilets are among the most common plumbing headaches at home — they waste water, raise bills, and can lead to bigger repairs if ignored. This guide walks Grosse Pointe homeowners through clear, step-by-step DIY fixes that stop waste, restore dependable flushing, and help you know when to call in a pro. You’ll learn how to diagnose a constantly running toilet, replace a flapper and adjust a fill valve, clear clogs safely with a plunger or auger, find and stop leaks, and pick the right replacement parts. Practical checklists, tool lists, and compact comparison tables make it simple to act quickly and avoid repeated problems. Read on for hands-on steps, quick answers, and local options for professional help if a job goes beyond DIY. How Do You Fix a Running Toilet? A running toilet wastes water because the tank keeps refilling or trickling into the bowl. Start by identifying whether the flapper, fill valve, or overflow/float is at fault. Listen for continuous water noise, lift the tank lid and watch the water level against the overflow tube, and add a few drops of food coloring to the tank to check for a leaky flapper. Diagnosing first stops the water loss and often restores normal flushing with a simple adjustment or part swap. Here’s a short 3–4 step checklist you can follow right away. Confirm the leak: Put a few drops of dye in the tank and wait 15 minutes. If color shows in the bowl, the tank is leaking into the bowl. Inspect the flapper: Check for warping, mineral buildup, or a misaligned chain that keeps it from sealing. Check/adjust the fill valve and float: Lower the float or turn the fill-screw so the water sits about 1 inch below the overflow tube. Replace parts if needed: If cleaning and adjustments don’t work, swap the flapper or install a new fill-valve kit. If the toilet still runs after these steps, the table below helps match causes to fixes and shows when it’s time to call a professional. Different running-toilet causes need specific fixes and clear criteria for escalation. Cause Quick DIY Fix When to Call a Professional Worn or warped flapper Replace the flapper; clean the seat and set proper chain length Replacement doesn’t stop the leak or the valve seat is damaged High fill level / float misadjusted Lower the float or adjust the fill-valve screw Fill valve needs replacing or overfill keeps returning Faulty fill valve Install a new fill-valve assembly Repeated valve failures or internal tank hardware issues What Causes a Toilet to Keep Running? A toilet that won’t stop running usually comes from a few easy-to-check mechanical problems. The most common is a warped or deteriorated flapper that lets water seep into the bowl; mineral buildup or dirt can stop it sealing properly, and you may hear a steady trickle. Misadjusted floats or failing fill valves can set the water too high so it spills into the overflow tube and triggers constant refills. Less often, a worn flush-valve seat or internal corrosion prevents a good seal even after you replace the flapper — that usually needs a more involved repair or part replacement. Those clues make the problem straightforward to identify and lead into the replacement and adjustment steps that follow. Step-by-Step Guide to Replacing a Toilet Flapper and Adjusting the Fill Valve Replacing a flapper and adjusting the fill valve usually restores a tight tank seal and the correct water level with basic tools and a short time investment. Gather a new universal flapper, an adjustable fill valve or refill cup, pliers, a screwdriver, and a rag. Turn off the water at the shutoff valve and flush to empty the tank before you begin. Remove the old flapper by unhooking it from the flush lever and detaching the chain. Wipe the flush-valve seat clean with a rag, fit the new flapper with minimal chain slack, then turn the water back on and test with dye. To adjust the fill valve, find the adjustment screw or clip on the float cup and lower the water level to about 1 inch below the overflow tube — make small tweaks and flush to confirm. If the fill-valve assembly is damaged or noisy after adjustment, replacing the valve usually fixes the issue and improves long-term reliability. Why Is My Toilet Not Flushing Properly? Weak or incomplete flushing can come from partial clogs, rim-jet buildup, low tank water level, or flapper/flush-valve issues that interfere with siphon action. Figuring out whether the problem is a partial obstruction or a mechanical fault tells you if cleaning, an adjustment, or a repair is needed. The aim is to restore full siphonic action so the bowl clears in one flush — that saves water and avoids repeated plunging. Clogged trap or partial obstruction: Use a plunger or auger to clear the blockage and restore full flow. Mineral buildup in rim jets: Clean rim holes with a small wire or vinegar solution to improve water distribution. Low tank water level: Raise the fill level by adjusting the float to increase flush force. Weak flush from flapper/valve issues: Replace a warped flapper or clean the valve seat for a proper seal and lift. These focused checks help you choose the right DIY fix or decide if a more involved repair is needed. Common Reasons for Weak or Incomplete Toilet Flushes Weak flushes often come from a blocked bowl trap, reduced flow from calcified rim jets, or too little water in the tank to create the siphon. A clogged siphon or trap slows outflow — a quick look with a flashlight can reveal visible debris — while hardened mineral deposits in rim jets change water flow and reduce scouring. Low tank levels, caused by a misadjusted float or partly-closed supply valve, mean there isn’t enough water mass to complete the flush. A failing flapper or partial seal at

DIY Toilet Repairs: Fixing Common Toilet Problems Read More »

Accessibility Toolbar

Scroll to Top