
DIY Faucet Repairs: Troubleshoot and Fix Drips and Leaks with Confidence
A dripping faucet wastes water and points to worn parts inside the fixture. Left alone, those little drips raise your utility bill, speed up mineral buildup, and can cause corrosion or water damage. This guide walks you through diagnosing the usual causes, performing common DIY fixes, and deciding when to call a pro. You’ll learn the typical failures—worn washers, tired O‑rings, faulty cartridges—what tools and parts you’ll need, and step‑by‑step instructions for compression and cartridge faucets. We also cover routine maintenance like aerator cleaning and hard‑water prevention, plus a simple decision matrix to help Grosse Pointe homeowners choose DIY or professional repair. If you’d rather have a local team handle it, Frost & Kretsch Plumbing is listed as a nearby resource for guaranteed, transparent repairs and emergency response. Read on for clear troubleshooting steps, tool lists, and the signs that mean it’s time to hire a licensed plumber.
What Are the Most Common Causes of Faucet Leaks and Drips?
Most leaks come from worn internal parts, mineral buildup from hard water, or loose fittings that let seals fail. These problems show up as steady drips from the spout, moisture around handles and bases, or leaks that happen only when you operate the faucet. Spotting the cause early saves water and prevents follow‑on issues like clogged aerators or corroded valve seats. Below is a quick list of frequent causes with short explanations so you can target the right repair faster.
- Worn washers in compression faucets: Washers gradually thin from repeated compression against the valve seat, causing drips when the faucet is closed.
- Damaged O‑rings around handles: O‑rings dry out or crack over time, allowing water to escape near the handle or base.
- Faulty cartridges or valve seats: A failing cartridge or pitted valve seat can let water flow even when the handle is off.
- Mineral buildup and corrosion from hard water: Scale interferes with sealing surfaces and restricts flow, which leads to leaks and weak water pressure.
Each cause points to a specific repair: replace washers for compression faucets, swap O‑rings for handle leaks, and replace cartridges or descale valve seats for cartridge and ceramic‑disc faucets. The next sections show how to check spouts, handles, and bases so you can find the root cause quickly.
Why Is My Faucet Dripping from the Spout?
A steady drip from the spout usually means a failed sealing surface—like a washer, cartridge, or valve seat—though the exact symptom depends on faucet type and water pressure. Begin by turning off the shutoff valves and removing the aerator to check for debris; a clogged aerator can mimic low flow or odd dripping and is an easy first fix. If the aerator is clean, disassemble the faucet according to its type (compression stem or cartridge) and inspect the washer and seat for wear, pitting, or hard‑water deposits that stop a tight seal. Replacing a worn washer can be a quick fix, but if the valve seat is corroded or the cartridge is scored, you’ll need a permanent replacement to stop the leak reliably.
How to Identify Leaks Around the Faucet Handle and Base?
Leaks at the handle or base most often come from worn O‑rings, a loose packing nut, or a failed sink flange seal. Pinpointing exactly where and when the leak happens narrows the cause. Do a few simple checks: feel for moisture while you move the handle, wrap a tissue around the base to find slow weeps, and look under the sink for drips from supply lines or the mounting nut. If the leak only shows while the faucet is on, internal seals like O‑rings or the cartridge are likely. If it leaks while off, check the sink flange or supply‑line connections. Once you know the source, you can plan the repair—replace O‑rings or tighten the packing nut for handle leaks, or re‑seal/re‑mount the faucet for base leaks. The following section lists the tools and parts to have on hand for those jobs.
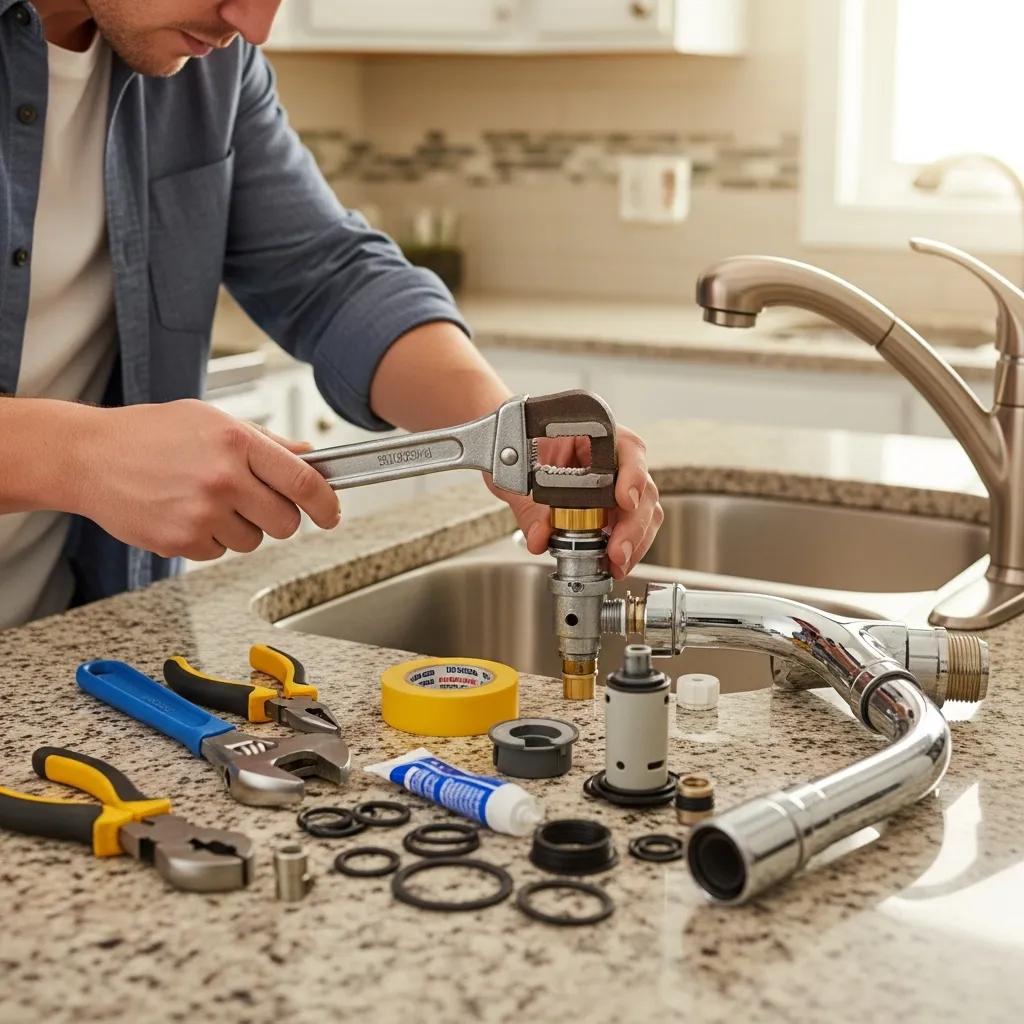
Which Tools and Parts Do You Need for DIY Faucet Leak Repairs?
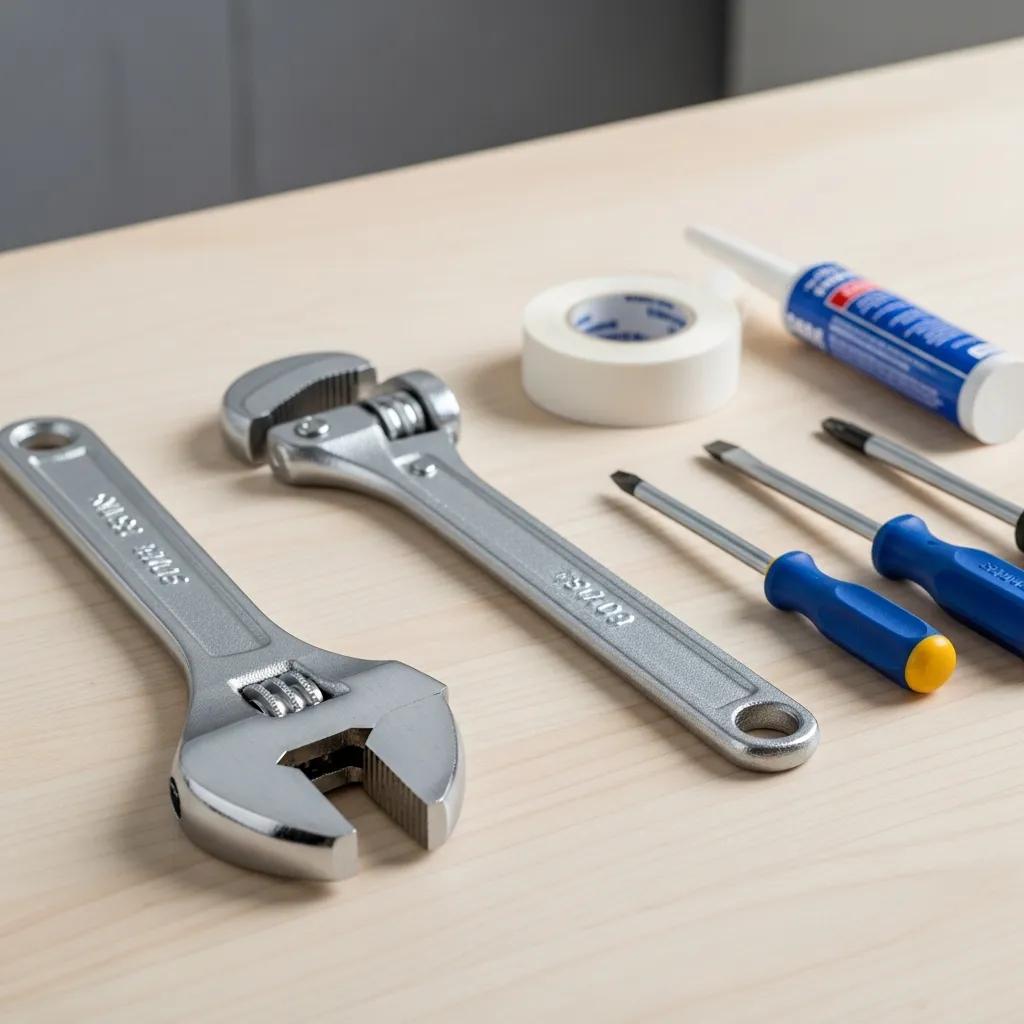
Most household faucet repairs need a short list of hand tools, a few small replacement parts, and basic consumables so you can disassemble safely and reassemble with a reliable seal. The right tools help you reach tight mounting nuts, remove handles and cartridges without damage, and reseal threaded connections to prevent repeat leaks. Below is a practical checklist of essential tools and commonly replaced parts, followed by a compact reference table to match part sizes before you head to the hardware store.
- Adjustable wrench and slip‑joint pliers: For gripping and turning nuts and fittings without rounding them off.
- Basin wrench: Designed to reach and turn the mounting nut under the sink where space is tight.
- Screwdrivers (flat and Phillips) and Allen keys: For removing handle screws and set screws safely.
This basic kit covers most compression and cartridge faucet repairs. The table below clarifies typical part sizes and replacement notes so you’re prepared and avoid extra trips for mismatched components.
Quick parts and sizing reference—use this to match old parts before buying replacements.
| Part | Typical Attributes | Replacement Notes |
|---|---|---|
| Washers | Common sizes: 1/4″&, 5/16″&, 3/8″& | Measure the old washer’s diameter and thickness; brass and rubber options vary by faucet model |
| O-rings | Cross-section sizes vary; common materials: EPDM, NBR | Swap them if brittle or flattened; install with plumber’s grease to extend life |
| Cartridges | Manufacturer‑specific shapes and retaining clips | Bring the old cartridge to the store for a match—many are brand specific |
| Aerators | Thread sizes: male/female 15/16″-27 (US) are common | Clean to fix flow issues or replace if corroded or stripped |
Matching parts by measurement and condition cuts down trial‑and‑error and helps you finish repairs in one trip. The next subsection explains each tool’s role and alternatives for homeowners without specialty equipment.
What Essential Tools Are Required for Faucet Repair?
Every tool in a faucet kit serves a purpose: a basin wrench reaches the mounting nut under the sink, while an adjustable wrench and pliers take care of supply lines and cartridge retaining nuts without over‑torquing them. A basin wrench saves time and avoids dropped hardware in cramped cabinets. Add a flashlight, towel, small bucket, and work gloves to control water during disassembly. If you don’t have a basin wrench, long‑handled pliers can work in a pinch or you can borrow one from a neighbor or tool rental—but using the right tool reduces the risk of damage and speeds reassembly.
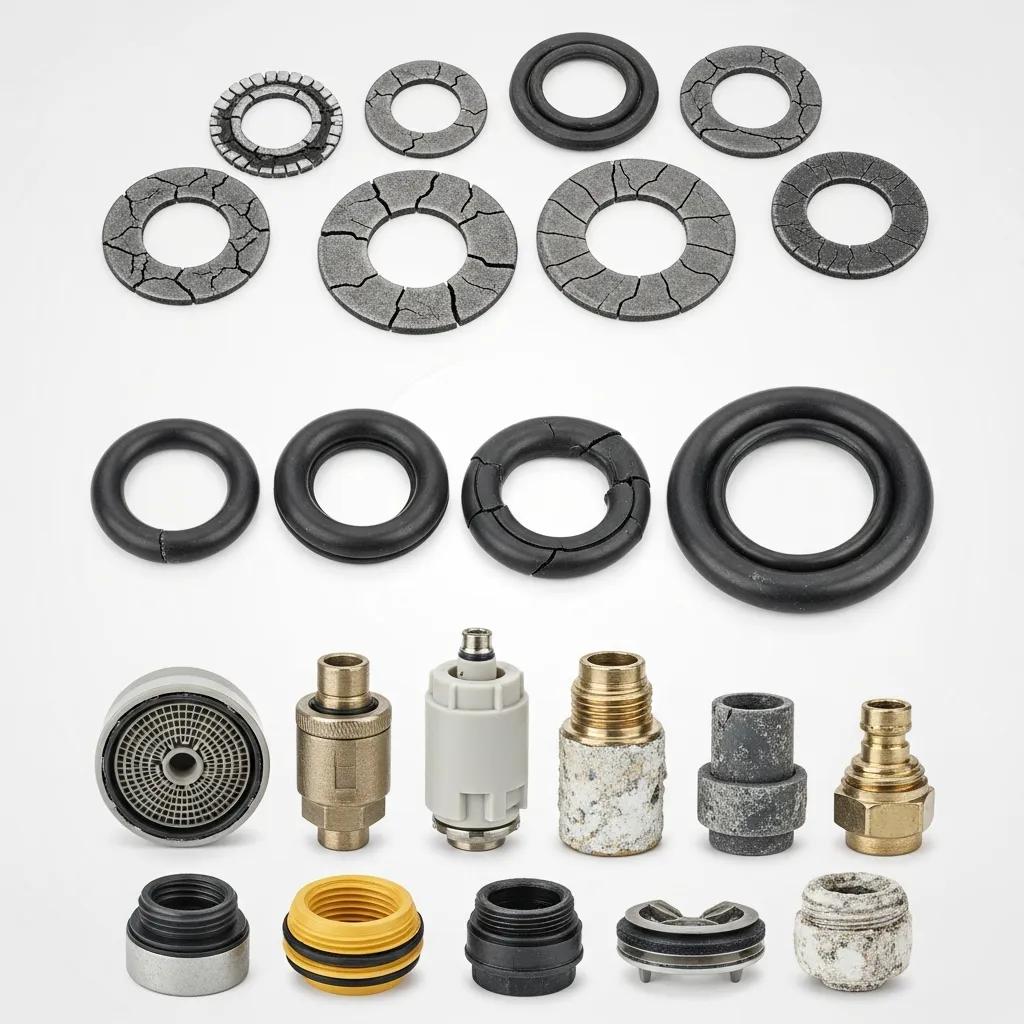
Which Faucet Parts Commonly Need Replacement?
Worn rubber washers (compression faucets), O‑rings (handle assemblies), and full cartridges (single‑handle designs) are the parts you’ll replace most often. A worn washer shows grooves or thinning; O‑rings look flattened or cracked; cartridge problems cause inconsistent hot/cold control or continuous drips. When you find multiple worn components—pitted valve seats, corroded stems, or stripped threads—it’s often more cost‑effective to replace the whole faucet. Bringing the damaged part to the store helps ensure you buy the right replacement. The next section maps symptoms to repairs for major faucet types.
How Do You Perform Step-by-Step DIY Repairs for Different Faucet Types?
Start by identifying your faucet type—compression, cartridge, ball, or ceramic‑disc—because each design uses different parts and disassembly steps. First, shut off the water supply and open the faucet to relieve pressure. Compression faucets let you remove the stem to change washers; cartridge faucets allow you to pull the cartridge after removing a retaining clip or screw. Below are short, numbered quick steps for compression and cartridge faucets followed by a symptom‑to‑fault reference table to help with diagnosis.
- Compression faucet quick steps: shut off the supply valves, remove handle and bonnet, extract the stem, inspect/replace washer and seat, reassemble and test.
- Cartridge faucet quick steps: shut off supply, remove handle and trim, release the retaining clip, extract the cartridge, inspect seats and O‑rings, replace cartridge and lube seals with plumber’s grease, reassemble and test.
These quick flows help you decide which parts to check first and whether a full cartridge replacement is the right move. The table below links common symptoms to likely faults and DIY fixes so you can work efficiently.
| Faucet Type | Symptom | Likely Fault | Typical DIY Fix |
|---|---|---|---|
| Compression faucet | Drip when closed | Worn washer or seat | Replace washer and inspect/replace valve seat |
| Cartridge faucet | Drip regardless of handle position | Worn cartridge or O‑rings | Replace cartridge; lubricate seals |
| Ball faucet | Leaks during handle movement | Damaged cam or seals | Replace seals or the ball assembly |
| Ceramic-disc faucet | Drip or uneven flow | Worn seals or hardened discs | Replace seals or replace the cartridge |
Identifying the faucet type and matching symptoms to likely faults cuts down unnecessary teardown. The next two subsections give step‑by‑step instructions for the most common repair scenarios.
How to Repair a Compression Faucet Leak?
Compression faucets seal by pressing a washer against a valve seat, so most repairs focus on replacing that washer and checking the seat for pitting. After shutting off the water and draining the lines, remove the handle and stem to access the washer. Look for flattening or grooves on the washer and check the valve seat for pitting or corrosion that keeps the washer from sealing. Replace the washer with the correct size and consider lapping or replacing the valve seat if it’s damaged. Reassemble carefully and test under normal pressure. If the leak continues after replacing the washer and seat, the stem or packing nut may be worn and you should consider further inspection or a professional assessment.
What Are the Steps to Replace a Cartridge Faucet Cartridge?
Replacing a cartridge means removing trim caps, detaching retaining screws or clips, and pulling the cartridge straight out without damaging the housing. After turning off the water and removing the handle, remove the cartridge retaining device and pull the cartridge out. Inspect O‑rings for cracks and coat new O‑rings with plumber’s grease before inserting them. Install the cartridge in the correct orientation, secure the retaining clip, reassemble the trim, and test for leaks. If a new cartridge doesn’t stop the leak, inspect valve seats and inlet filters for debris or damage that would prevent a proper seal.
When Should You Call a Professional Plumber for Faucet Repairs in Grosse Pointe?
Calling a licensed plumber can prevent water damage, protect warranties, and stop repeated repairs that end up costing more. Get a pro if leaks persist after parts have been replaced, if components are corroded or seized and won’t come apart, if you see water damage or mold, or if local code or commercial fixtures require a licensed installer. Professionals handle tricky valve‑seat repairs, whole‑fixture replacements, and hidden supply‑line issues—and hiring one helps ensure the work meets local codes. Use the decision matrix below to weigh DIY versus professional service based on risk and symptom severity.
Decision matrix—use this quick table to decide when to try DIY and when to schedule a pro.
| Condition | Risk/Impact | Recommended Action |
|---|---|---|
| Persistent leak after parts change | Water damage, wasted water | Call a licensed plumber for diagnosis |
| Seized or broken valve stems or corroded parts | Risk of damage when forcing parts | Schedule professional service |
| Visible water damage or mold | Structural risk, health concern | Stop use and call a plumber immediately |
| Simple parts failure (washer/O‑ring) | Low risk | DIY replacement possible with proper tools |
If you’re unsure or see structural risk, a licensed plumber will minimize further damage and safely handle concealed issues. The next subsection lists red flags that mean you should stop DIY and call a pro.
What Are the Signs That DIY Faucet Repair Isn’t Enough?
Stop DIY and call a professional if leaks continue after correct part replacement, if parts are corroded or seized, or if you find water damage, mold, or structural problems that need immediate attention. Other red flags include valve stems you can’t extract safely, unknown internal damage discovered during disassembly, or supply‑line failures under the sink where shutoff valves don’t fully isolate the fixture. Temporary measures—placing a bucket, shutting off the water, and closing the main shutoff—can limit damage, but persistent or complex failures require a licensed inspection to avoid higher repair costs later. When you see these indicators, schedule professional service to protect your home and plumbing.
What Are the Benefits of Professional Faucet Repair Services by Frost & Kretsch Plumbing?
Frost & Kretsch Plumbing provides licensed, insured technicians with local experience in fixture repair and installation, leak detection, drain cleaning, water‑heater service, and 24/7 emergency plumbing. Their transparent pricing and satisfaction guarantee give homeowners peace of mind, and their familiarity with Grosse Pointe and surrounding areas means faster response for urgent leaks. A licensed pro reduces the risk of improper repairs that could void warranties or hide damage—and they can handle complex valve seats, corroded supply lines, and commercial fixtures safely. To schedule service or request a free estimate, contact Frost & Kretsch Plumbing through their website or Google Business Profile for local appointment and emergency options.
How Can You Maintain Your Faucet to Prevent Future Leaks and Drips?
Routine maintenance keeps faucets working longer and prevents leaks by removing mineral deposits, lubricating seals, and catching small issues before they grow. Regular tasks include cleaning aerators every few months, replacing worn O‑rings and washers promptly, and checking supply‑line connections for tightness and corrosion. In hard‑water areas, descaling removable parts and using vinegar soaks can slow mineral buildup that wears sealing surfaces. Periodic lubrication with plumber’s grease keeps O‑rings supple. These simple steps reduce water waste and extend fixture life—see the next subsections for practical aerator care and hard‑water tips.
What Are Best Practices for Cleaning and Maintaining Faucet Aerators?
Cleaning the aerator often restores flow and solves uneven spray problems. Unscrew the aerator, soak its parts in vinegar to dissolve scale, and brush gently to remove debris before reassembly. How often you clean depends on your water quality, but quarterly checks are a good baseline. If cleaning helps, reassemble and add a light thread seal if the threads leak. Replace aerators that are corroded, cracked, or stripped to ensure a tight seal and consistent spray. Regular aerator care keeps debris and scale from reaching internal components and is an inexpensive way to avoid more complex repairs.
Aerator cleaning checklist:
- Shut off water and unscrew the aerator.
- Disassemble and soak parts in vinegar for 15–60 minutes.
- Brush deposits away, rinse, and reassemble.
- Test flow and replace the aerator if damaged.
Routine aerator cleaning preserves flow and protects seals—this quick task prevents buildup‑related problems that can turn into cartridge or valve‑seat repairs.
How Does Hard Water Affect Faucets and How to Mitigate It?
Hard water leaves mineral deposits on valve seats, O‑rings, and cartridge surfaces, speeding wear and causing sealing failures that lead to leaks and reduced flow. Short‑term fixes include descaling removable parts in vinegar and checking aerators and cartridges more often. For ongoing hard‑water issues, consider whole‑home water treatment or point‑of‑use filters. If buildup is extensive, a professional can assess whether descaling, part replacement, or full fixture replacement is the most cost‑effective option. Proper mitigation reduces seal abrasion and extends the service life of washers, O‑rings, and cartridges, cutting down on future repairs.
Frequently Asked Questions
What should I do if my faucet is leaking from the base?
If your faucet leaks at the base, start by checking the mounting nut under the sink—tighten it if loose. If the nut is secure, inspect the O‑rings for wear or damage and replace them if needed. If the leak continues after those checks, re‑seal the sink flange or contact a professional plumber for a closer look.
How can I tell if my faucet needs a new cartridge?
Consider a new cartridge if you have inconsistent flow, trouble controlling temperature, or continuous dripping no matter the handle position. To confirm, shut off the water, disassemble the faucet, and inspect the cartridge for cracks or heavy mineral buildup. If cleaning doesn’t help, replacing the cartridge is usually the best way to restore proper function.
What are the signs of hard water damage on faucets?
Hard water shows up as mineral buildup around aerators, cloudy or white spots on metal surfaces, and reduced flow. You may also find seals and O‑rings wearing out faster than expected. Regular cleaning helps, but persistent issues may call for a water softener or descaling treatments to protect fixtures.
How often should I perform maintenance on my faucet?
Routine maintenance every three to six months is a good rule: clean the aerator, check for leaks, and inspect O‑rings and washers. If you have hard water, check more often. Proactive care extends faucet life and reduces the chance of unexpected leaks.
Can I use any type of lubricant on faucet parts?
Use plumber’s grease—it’s made for plumbing seals and is safe on rubber and plastic. Avoid petroleum‑based lubricants, which can degrade rubber and cause more leaks. When in doubt, follow the faucet manufacturer’s recommendations.
What should I do if I can't identify the source of a leak?
If you can’t find the leak’s source, call a professional plumber. Pros have the tools and experience to diagnose hidden problems—like supply‑line issues or internal part failures—that aren’t obvious. If you see water damage or mold, address it quickly to protect your home; a licensed plumber can inspect and recommend the right fix.
Why Is My Faucet Dripping Constantly?
A constant drip usually comes from a worn washer, a damaged O‑ring, or a failing cartridge that no longer seals properly; mineral buildup speeds these failures. First steps are shutting off the water, removing and cleaning the aerator, and inspecting visible seals for cracks or flattening. If you find a damaged part, replacing it often stops the drip. If the leak continues or you discover corroded valve seats or seized parts, stop and schedule a professional inspection to avoid water damage and repeated repairs.
Is It Worth Fixing a Leaky Faucet or Should I Replace It?
Repair is usually the most cost‑effective choice for single‑part failures—washers, O‑rings, or cartridges—especially when the fixture is fairly new and looks good. Replacement makes sense when multiple components have failed, the valve seat is badly pitted, or the fixture is old and inefficient. Consider the faucet’s age, the total cost of parts and time, ongoing water waste, and your aesthetic or functional goals. For older or recurring problems, ask a licensed plumber for a cost comparison and to ensure any replacement meets local codes and long‑term needs.
Conclusion
Knowing how to troubleshoot and repair common faucet leaks helps you save water and avoid unnecessary repairs. With the right tools and steps you can handle worn washers and O‑rings yourself, and regular maintenance keeps problems from returning. If you’d rather leave it to a local pro, Frost & Kretsch Plumbing offers reliable service, clear pricing, and emergency response in the Grosse Pointe area. Explore our resources or schedule a consultation to keep your faucets working smoothly.