Basic Plumbing Tools Every Homeowner Should Own — What to Buy, How to Use Them, and When to Call a Pro
Plumbing troubles are one of the most common headaches in a home — but a small, well-chosen tool kit will let you handle most of them quickly and safely. This guide lists the basic tools every homeowner should have, explains how each one works, and gives clear, practical steps for routine fixes so you can tackle leaks, clogs, and loose fittings with confidence. You’ll also learn the warning signs that a problem needs a licensed professional and what those pros can do when DIY isn’t enough. We organize tools into core categories — wrenches, drain tools, fixture repair items, and safety gear — and walk through real-world use, upkeep, and when to stop and call for help. Read on to build a reliable home plumbing kit and know when to escalate to an expert.
What Are the Essential Plumbing Tools Every Homeowner Should Have?
A few basic plumbing tools let most homeowners fix the routine problems that cause the most disruption: clogged drains, dripping faucets, and loose supply lines. Five core items cover the majority of common jobs, are easy to store, and won’t break the bank. Each tool does a specific job — gripping, sealing, cutting, or clearing — so you can match what you’ve got to the repair at hand. After the essentials we list a few helpful extras, then a quick reference table matches tools to common household issues and flags when it’s time to call a pro. Knowing each tool’s limits keeps small jobs small and prevents accidental escalation.
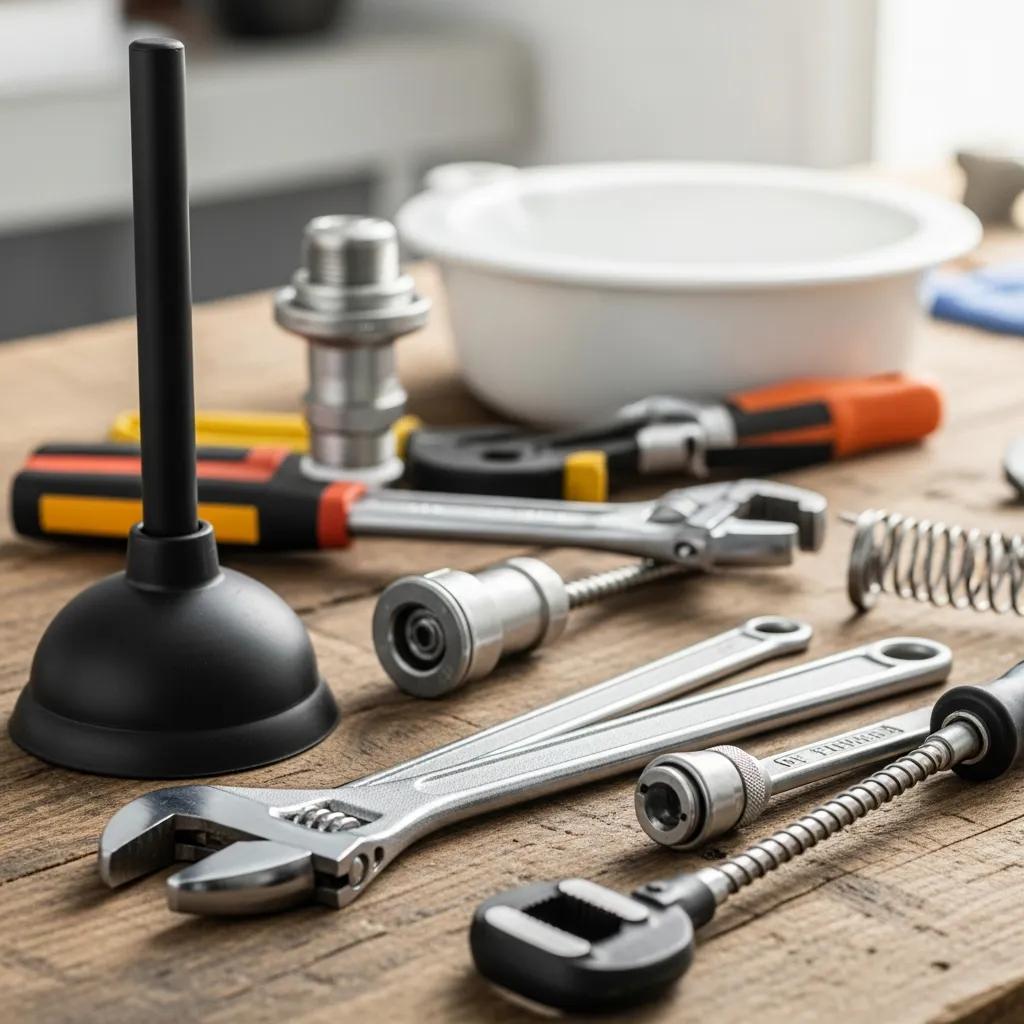
The basic toolkit every homeowner should own:
- Plunger (cup and flange) — for most sink and toilet clogs.
- Adjustable wrench — for tightening and loosening fixture nuts.
- Pipe wrench — for tougher threaded or iron pipe connections.
- Basin wrench — to reach mounting nuts under sinks and behind fixtures.
- Small hand drain snake (manual auger) — for hair and minor blockages.
Those five tools cover most quick fixes and cut downtime. Below are a few useful secondary items to round out a practical home kit.
Useful secondary tools to keep on hand:
- Thread seal tape (PTFE tape) — seals pipe threads and helps stop small leaks.
- Pliers and channel-lock pliers — for gripping odd shapes and valve stems.
- Hacksaw or pipe cutter — for short runs of copper or PVC during small repairs.
- Utility knife and small bucket — for containment and cleanup.
Having these things ready speeds repairs and avoids late-night panic calls. When diagnostics or access exceed DIY limits, licensed professionals bring specialized equipment and training to finish the job safely — Frost & Kretsch Plumbing offers licensed, insured service and 24/7 availability when you need professional help.
Quick reference — which tool to use for common problems and when to call a pro:
| Tool | Primary Use | Best for / Example task |
|---|---|---|
| Plunger (cup/flange) | Create pressure and seal to dislodge clogs | Unclog a kitchen sink or toilet with a localized blockage |
| Adjustable wrench | Tighten or loosen hex nuts on fixtures | Replace a faucet supply line or tighten a leaking connector |
| Pipe wrench | Grip and turn threaded pipe | Dismantle old iron pipe or stubborn threaded fittings |
| Basin wrench | Reach confined mounting nuts under sinks | Remove faucet mounting nuts in tight spaces |
| Hand drain snake (manual auger) | Mechanically break up or pull out clogs | Clear hair and soap buildup from a bathroom sink trap |
Use this table to pick the right tool for typical household problems and to spot situations where a licensed pro is the safer choice.
Which Core Tools Address Common Plumbing Repairs?
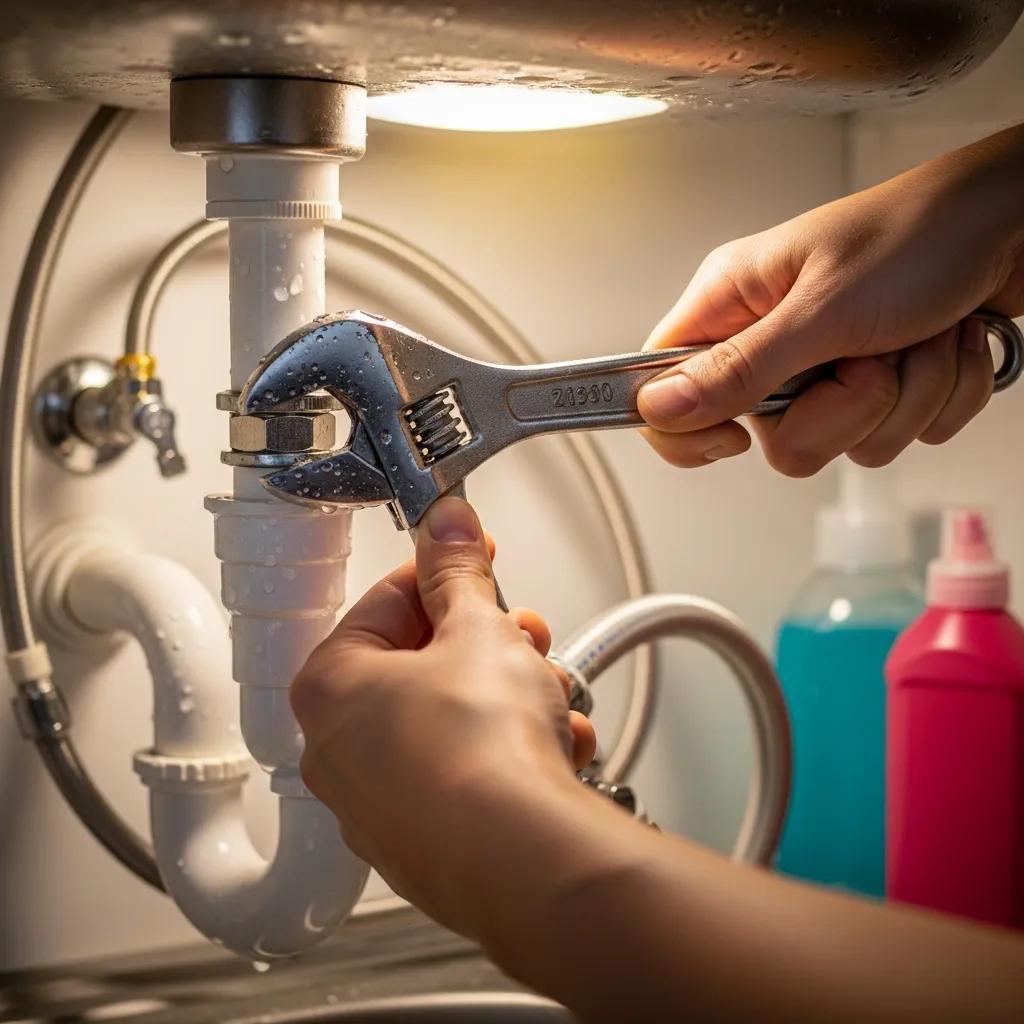
Matching the right tool to the repair speeds the job and lowers the risk of accidental damage. For a leaky faucet, an adjustable wrench, pliers, and a replacement washer or cartridge will usually do the trick — these let you remove trim, secure supply lines, and test seals. A clogged sink often clears with a cup plunger or a short hand auger that reaches the P-trap; plungers use pressure while augers work mechanically. Tightening a loose supply line or replacing a shut-off washer is typically solved with an adjustable wrench and a bucket for catchment. If leaks persist after tightening, you see visible corrosion, or clogs return repeatedly, those can be signs of corrosion, failing joints, or sewer issues that need a professional inspection.
Practical tips: reach for a basin wrench when a faucet nut is out of reach for pliers; use a pipe wrench when old threaded iron resists an adjustable wrench. If a repair would require cutting a main line, digging, or a sewer-line inspection, stop DIY and call a licensed plumber.
How Do These Tools Function in Basic Home Plumbing Tasks?
Knowing how a tool does its job helps you use it correctly and avoid damage. A plunger makes a watertight seal and delivers alternating pressure to loosen a clog — a proper seal and steady strokes matter. An adjustable wrench has a movable jaw to fit many nut sizes; position the fixed jaw to take the load and avoid slippage. A pipe wrench has serrated jaws that bite into round pipe — apply steady force and avoid angles that round off the pipe. A basin wrench reaches into cramped spaces and pivots to apply torque on faucet mounting nuts — set the head before turning. With a manual drain snake, feed until you feel resistance, rotate to engage the clog, and withdraw to remove debris while protecting nearby finishes.
Using tools properly prevents mistakes — for example, don’t twist a pipe with an adjustable wrench when a pipe wrench is the right choice. The next section covers safe wrench techniques in more detail.
How to Use Common Plumbing Wrenches Safely and Effectively?
Using the right wrench with the correct technique prevents stripped fasteners, damaged finishes, and injury. Wrenches turn hand force into torque; control that torque, match jaw type to material, and keep proper leverage. Safety basics: secure the workpiece, pull the wrench toward you instead of pushing when practical, place the fixed jaw against the stationary side of a fitting, and protect chrome or soft finishes with a cloth or jaw protectors. Regular wrench care — cleaning teeth, lubricating adjustment mechanisms, and inspecting for wear — keeps tools reliable.
Below is a concise comparison of common wrench types, safety tips, and usage notes to help you pick the right tool for home repairs.
| Wrench Type | Key Safety Tip | Torque / Use-case note |
|---|---|---|
| Adjustable wrench | Fit the jaw correctly and protect chrome surfaces | Versatile for nuts and bolts; avoid heavy torque on large pipe fittings |
| Pipe wrench | Keep teeth clean and use on threaded metal pipe only | High gripping force; best for steel or iron threaded connections |
| Basin wrench | Secure the pivot before turning and support the faucet body | Made for tight spaces; offers less torque than a pipe wrench |
This comparison makes it easier to choose the right wrench and use it without causing damage.
What Are the Differences Between Pipe, Adjustable, and Basin Wrenches?
Each wrench is built for different shapes and materials, which determines where it works best. An adjustable wrench (crescent) has smooth jaws and an adjustable jaw for different nut sizes — great for finished hardware where you don’t want marks. A pipe wrench has toothed jaws that bite into round pipe for a firm grip — not suitable for chrome or soft metals. A basin wrench has a long shaft and swiveling head so you can reach mounting nuts behind sinks where other wrenches won’t fit. Maintenance differs too: keep adjustable-jaw faces clean, clear pipe wrench teeth of debris, and check basin wrench pivots for free movement.
Knowing these differences helps you choose the tool that reduces risk and gets the job done. The next subsection offers scenario-based guidance for picking the correct wrench.
When Should You Use Each Type of Wrench in Home Repairs?
Use an adjustable wrench on visible hex nuts for supply lines, valve stems, and fixture hardware where controlled torque and protective covers matter. Choose a pipe wrench for older, threaded metal pipes and heavy fittings that need a biting jaw to break corrosion. Reach for a basin wrench when you must work on mounting nuts under a sink where space is limited. As a rule of thumb: if the fastener is hex-shaped and finished, use an adjustable wrench; if it’s round threaded pipe, use a pipe wrench; if access is tight under a sink, use a basin wrench. Don’t use a pipe wrench on chrome-plated or soft metals — protect those with a cloth and an adjustable wrench instead.
Picking the right wrench keeps repairs efficient and avoids unnecessary force or damage.
What DIY Drain Clearing Tools Are Most Effective for Homeowners?
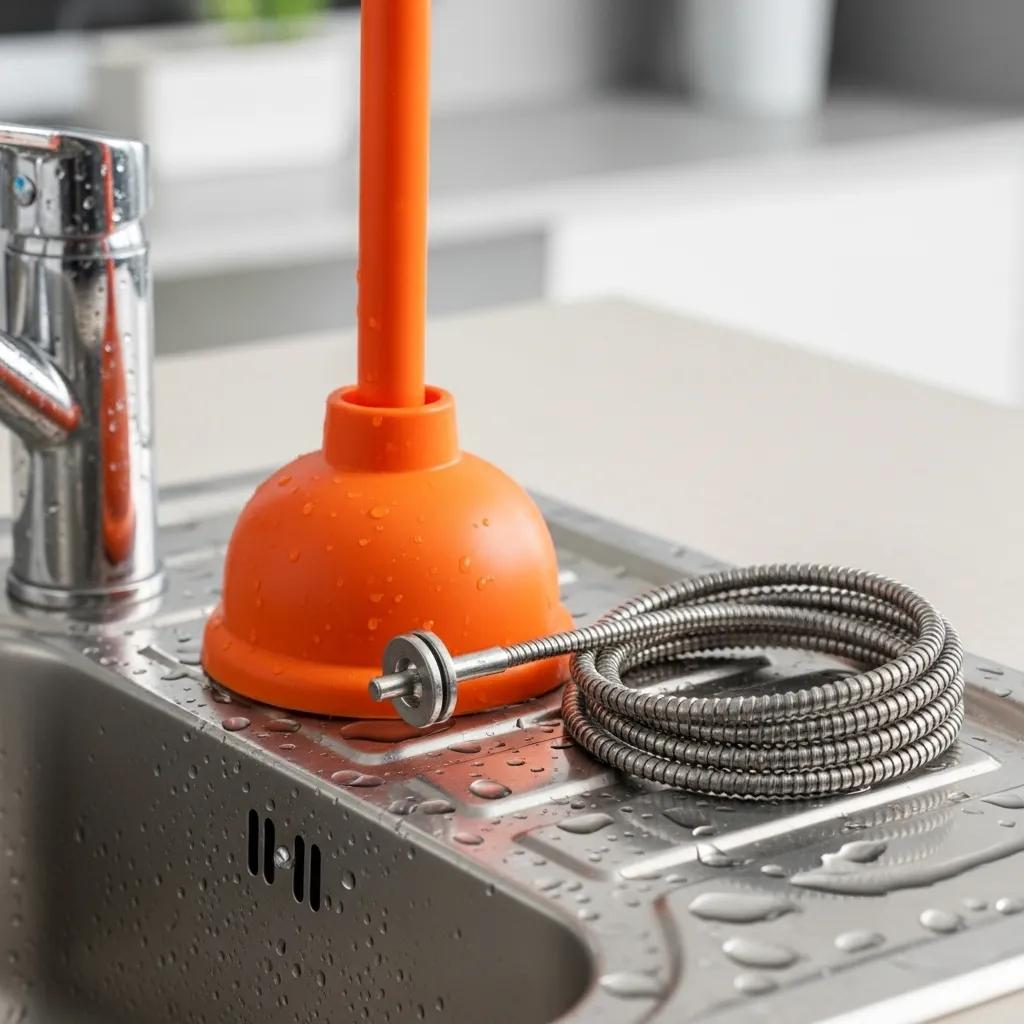
Start with the simplest drain tools and only escalate as needed. Plungers build pressure and are effective for sinks and toilets when used properly. Manual drain snakes (hand augers) physically remove hair, soap, and small debris in shallow runs; electric augers reach deeper and deliver more torque for stubborn blockages. Home remedies like baking soda and vinegar or enzyme cleaners can help maintenance but have limits — chemical methods rarely clear compacted clogs and can complicate later mechanical cleanouts. Below we compare plungers, manual augers, and electric augers so you can choose the right option, followed by a short table of pros and cons.
We also cover how plungers and augers work and when to stop DIY to avoid damaging pipes.
| Drain Tool | Pros | Cons / Limitations |
|---|---|---|
| Cup plunger | Cheap and effective for many sink and toilet clogs | Needs a good seal; won’t clear deep or solid obstructions |
| Manual drain snake | Affordable, portable, good for hair and shallow clogs | Limited reach and torque; can tangle if used incorrectly |
| Electric drain auger | More power and deeper reach | Costlier and can damage older pipes if misused |
This comparison helps homeowners decide when to use a simple tool and when a professional’s equipment is the better choice.
How Do Plungers and Drain Snakes Work to Unclog Drains?
Plungers clear clogs by sealing the drain and using alternating pressure to dislodge trapped material — use a cup plunger for sinks and a flange plunger for toilets. Proper plunging includes sealing overflow openings, using firm rhythmic thrusts, and keeping the seal intact; success shows as water moving or draining freely. Manual drain snakes feed a flexible cable into the trap, rotate to snag or break the clog, then withdraw with the debris. Stop and call a pro if you see persistent backups after repeated attempts, multiple fixtures backing up, or sewage odors — those point to a deeper blockage.
If plunging and augering don’t clear the clog, stop and arrange for professional inspection — continued force can damage older or fragile plumbing.
What Are the Pros and Cons of Manual Versus Electric Drain Snakes?
Manual snakes are inexpensive, easy to use, and ideal for short household runs and hair clogs; they’re quiet and generally safe for plastic and metal pipes when used carefully. Electric augers add torque and reach for tougher blockages deeper in the line but must be handled carefully around older joints and PVC. Electric units introduce safety risks too — a rotating cable can whip if not controlled — so gloves and eye protection are recommended. For most homeowners, a plunger and a manual auger cover the majority of issues; reserve electric augers for repeat clogs or when you suspect a deeper obstruction.
If both methods fail, professional services such as camera inspection and hydro-jetting are the safer next steps.
For deep or recurring blockages, professionals use high-pressure hydro-jetting and sewer cameras — if manual and electric tools don’t work, contact a licensed provider for targeted diagnostics and cleaning.
Which Tools Are Needed for Common Faucet and Toilet Repairs?
Faucet and toilet repairs usually require a short list of specialized tools and a few spare parts. For faucets, useful items include adjustable pliers, a basin wrench for mounting nuts, a faucet-seat wrench or cartridge puller for internal work, thread seal tape, and spare O-rings or cartridges. For toilets, keep an adjustable wrench for tank nuts, a sponge or small pump to remove excess water, a flapper tool, and replacement flappers or fill valves. Having common replacement parts like washers and O-rings on hand often lets you finish a repair in one visit and stops water waste from slow leaks.
Below is a practical checklist of the core tools homeowners commonly need for faucet and toilet fixes.
Essential faucet and toilet repair tools:
- Adjustable pliers and wrench for supply lines and tank nuts.
- Basin wrench for hard-to-reach sink mounting hardware.
- Faucet seat wrench or cartridge puller for internal faucet repairs.
- Toilet flapper tool and a spare flapper to stop running toilets.
- Thread seal tape, a small bucket, and rags for containment and reassembly.
With these tools ready, many common fixture problems can be resolved quickly. The next subsection explains what to check first when diagnosing leaks and running fixtures.
What Basic Tools Help Fix Leaky Faucets and Running Toilets?
Start a faucet repair by turning off the supply valve, then use an adjustable or basin wrench to remove handles and inspect washers, O-rings, and cartridges — worn seals are often the culprit and are inexpensive to replace. For a running toilet, check the flapper and chain in the tank; use a flapper tool to adjust or replace the flapper — a new flapper often stops continuous flow. Use thread seal tape on threaded reconnects and test for leaks after reassembly. If corrosion or heavy mineral buildup prevents safe removal or the valve body is damaged, that’s a sign the job needs professional replacement.
Begin with the simplest fixes — replacing seals and flappers — and move to more invasive repairs only if parts are beyond saving.
How to Use Faucet Seat Wrenches and Toilet Flapper Tools Properly?
A faucet seat wrench or cartridge puller removes internal valve parts without harming the faucet body — seat the wrench squarely, apply steady counterclockwise torque, and protect chrome finishes with a cloth. For toilet flappers, use the flapper tool to free the chain and inspect the flapper for warping or buildup; when installing a new flapper, make sure the seal sits flat and the chain has a little slack — too tight or too loose can cause running. Don’t over-tighten mounting nuts and always turn the supply back on slowly while watching for drips. If replacement parts don’t fix the issue, the valve or tank assembly may need professional assessment.
Using these tools correctly lowers the chance of damage and restores leak-free operation more quickly.
What Essential Safety Gear Should Homeowners Use During Plumbing Repairs?
Personal protective equipment and basic workspace prep reduce injury risk, avoid contamination, and protect home finishes. Recommended safety gear includes nitrile or chemical-resistant gloves to protect skin, ANSI-rated safety glasses to shield eyes from splashes and debris, and non-slip shoes for traction on wet floors. Know how to shut off the main or local water supply before disassembly — a shut-off valve key or wrench can be indispensable. Also have containment items like buckets, rags, and towels to catch spills, and use good lighting so you can see clearly in tight spaces.
These precautions protect you and your home. The list below explains the essentials and why each matters.
Recommended safety gear and supplies:
- Gloves (nitrile or chemical-resistant) to protect against contaminants and cleaners.
- Safety glasses (ANSI-rated) to guard against splashes and flying debris.
- Shut-off valve key or wrench to isolate the water supply before work begins.
- Buckets, rags, and floor protection to contain leaks and protect surfaces.
Use these precautions every time to keep repairs controlled, reduce mess, and avoid turning a small job into a big cleanup.
Why Are Gloves, Safety Glasses, and Shut-Off Valve Keys Important?
Gloves protect your skin from contaminated water, chemicals, and sharp pipe edges; nitrile or chemical-resistant gloves reduce irritation and improve grip when handling wet parts. Safety glasses protect your eyes from splashes, corroded pipe fragments, or debris released during augering — eye protection is a small investment that prevents serious injury. Knowing how to operate shut-off valves or carrying a valve key lets you stop water quickly, preventing flooding and limiting damage while you work. Choose properly rated gear and a comfortable fit so the equipment does its job when you need it.
These items lower health risks and property damage. The next subsection covers workspace preparation for safe plumbing maintenance.
How to Prepare Your Workspace for Safe Plumbing Maintenance?
Clear the area of valuables and cover floors or cabinet surfaces with towels or protective sheeting to catch drips. Lay out tools and parts on a tray or in a toolbox in the order you’ll use them so you’re not searching mid-job, and make sure you have good lighting — a hands-free lamp or headlamp works well for under-sink work. Place a bucket under the work area to catch water and keep rags handy for quick cleanups; for toilet jobs, bring a sponge and a small hand pump to remove excess water before disassembly. Finally, shut off the correct water supply and confirm flow has stopped before loosening fittings — that step prevents accidental flooding and is the foundation of safe plumbing practice.
Good preparation shortens repair time, lowers stress, and prevents avoidable mistakes.
When Should You Call a Professional Plumber Instead of DIY?
Know when to stop: call a professional if a problem risks property, health, or safety, or if your tools and experience can’t diagnose or fix it. Call immediately for burst pipes, sewage backups, repeated clogs across multiple fixtures, water heater failures, or visible sewer-line damage. Delaying professional help can lead to bigger damage, mold, and health hazards from sewage exposure, so recognizing these signs early protects your home and family. The checklist below helps you decide quickly whether to try a DIY fix or contact a licensed professional for safe, code-compliant solutions.
If you need professional help in Grosse Pointe and nearby communities, Frost & Kretsch Plumbing offers emergency and specialized services with clear guarantees and careful diagnostics designed to minimize disruption.
- Call a plumber for a burst pipe or uncontrolled leak.
- Call a plumber if sewage is backing up into fixtures or drains.
- Call a plumber for recurring clogs that affect multiple fixtures.
- Call a plumber for a water heater failure with no safe temporary workaround.
- Call a plumber for visible sewer-line damage or when excavation is needed.
This checklist helps you choose action quickly. The next subsections explain which issues require licensing and how a local provider handles emergencies.
What Plumbing Issues Require Licensed and Insured Expert Services?
Complex or hazardous problems require licensed, insured technicians because they involve code compliance, specialized gear, or safety risks. Examples include sewer-line backups (which can require camera inspection and hydro-jetting), major leaks in hidden walls or ceilings (risking structural damage and mold), excavation for broken mains, gas-related fixture repairs, and full water heater replacements that need certified installation. Licensing and insurance ensure technicians follow local codes, carry liability coverage, and have the tools and training to perform safe, effective repairs. Calling a pro early for these issues prevents bigger costs and collateral damage.
Spotting these conditions early limits repair scope and expense.
How Does Frost & Kretsch Plumbing Provide Emergency and Specialized Solutions?
Frost & Kretsch Plumbing serves Grosse Pointe and nearby areas with fast escalation for emergencies and careful diagnostics for complex jobs. Their services include sewer and drain cleaning, excavation for broken lines, water heater repair and replacement, fixture installation, and 24/7 emergency response. They emphasize customer assurances such as 24/7 Emergency Service; 100% Satisfaction Guarantee; Transparent, Upfront Pricing; Licensed and Insured Technicians; and Minimally Invasive Solutions using advanced diagnostic tools. Those commitments help homeowners move from DIY attempts to professional intervention with clear expectations about pricing, qualifications, and methods.
If a clog or leak is beyond household tools — requiring hydro-jetting, camera inspection, or excavation — call for a licensed inspection so the root cause can be diagnosed and the least invasive fix chosen.
Frequently Asked Questions
What should I do if my DIY plumbing repair doesn't work?
If your DIY repair doesn’t succeed, stop and reassess to avoid making the problem worse. Determine whether the issue needs specialized tools or professional diagnosis. If you see ongoing leaks, multiple fixture problems, or signs of water damage, call a licensed plumber. A pro can diagnose the root cause and make repairs that meet code and protect your home.
How can I maintain my plumbing tools for longevity?
Keep tools clean and dry after use, remove debris and grease, and inspect for wear. For wrenches, remove rust and keep the jaws clean for a secure grip. Store tools in a dry, organized place and lubricate moving parts as needed. Replacing worn parts promptly keeps tools safe and reliable.
Are there any plumbing repairs I can do without professional help?
Yes — many minor repairs are homeowner-friendly. Common DIY tasks include unclogging drains with a plunger or manual snake, replacing faucet washers, and tightening loose fittings. Know your limits: major leaks, sewer backups, and gas-line issues require a licensed plumber to avoid safety hazards and bigger damage.
What are the signs that I need to replace my plumbing fixtures?
Replace fixtures when you see persistent leaks, corrosion, or rust; when low water pressure or frequent clogs indicate failure; or when fixtures are old and inefficient. Upgrading to newer models can improve water efficiency and performance. If you’re unsure, have a pro inspect the condition before replacing.
How can I prevent plumbing issues in my home?
Prevent problems with regular maintenance and mindful use. Schedule periodic inspections, avoid flushing non-biodegradable items, use drain screens, and perform gentle drain cleaning when needed. Maintain proper water pressure and water heater settings to extend equipment life and reduce leak risk.
What should I do if I have a plumbing emergency?
In an emergency, shut off the water supply immediately to limit damage. Find the main shut-off valve and turn it off. If there is sewage or flooding, avoid contact and evacuate if necessary. After securing the area, decide whether you can safely manage a temporary fix or need to call a licensed plumber — for burst pipes and sewage backups, get professional help right away.
Conclusion
A small, well-stocked plumbing kit gives you the confidence to handle most everyday repairs, saving time and money. Know how to use each tool, keep safety top of mind, and recognize the point where a problem needs professional attention. When repairs require more than a homeowner’s tools or knowledge, call a licensed plumber to protect your home and ensure the work meets code. Start building your toolkit today and take charge of routine plumbing maintenance.