Essential DIY Plumbing Tools Every Homeowner Should Own — A Clear, Practical Guide
Having a basic plumbing toolkit gives you the power to stop small leaks, clear routine clogs, and handle simple repairs before they turn into big problems. This guide walks you through the tools every homeowner should own, how each one works, and the safest, most effective ways to use them — from plunging and snaking drains to cutting pipes and sealing fittings. You’ll find a prioritized tool list, step‑by‑step instructions for plungers and drain snakes, recommendations for wrenches and cutters, and a straightforward maintenance schedule to prevent future trouble. If you’re in the Grosse Pointe area and need professional help, Frost & Kretsch Plumbing is a nearby resource for advanced repairs and 24/7 emergency service. Our aim here is education first: learn the safe DIY basics, then call a pro when a job is beyond your reach. The article is organized into sections covering essential tools, how to use them, choosing the right unclogging method, building and caring for a toolkit, when to call a plumber, and easy preventative tips to keep your plumbing running smoothly.
What tools should every homeowner keep for plumbing?
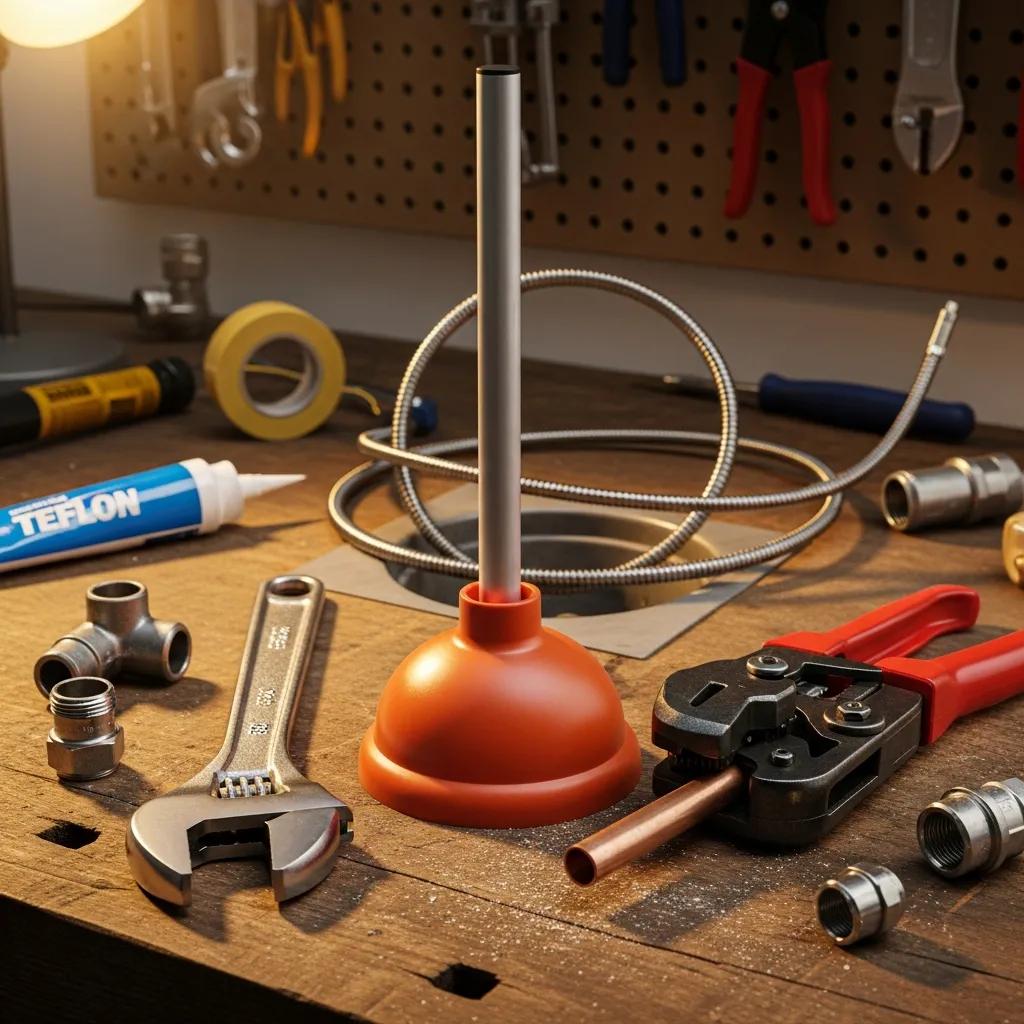
Essential plumbing tools are simple, reliable items that help you find, isolate, and often fix common household problems. They give you leverage, create seals, and clear blockages so water can flow and leaks stop. The right tools save time and limit water damage — they’re the foundation of any good home repair kit. Below is a prioritized shopping list with short descriptions to help you choose the right pieces for typical residential fixtures and pipe sizes.
- Plunger: A suction tool for dislodging sink and toilet clogs.
- Adjustable wrench (Crescent): A variable‑jaw wrench for tightening and loosening fixture and supply‑line nuts.
- Pipe wrench: Heavy‑duty wrench with serrated jaws for gripping threaded pipe fittings.
- Basin wrench: Long‑handled wrench that reaches nuts behind sinks and faucets.
- Pipe cutter (PVC/copper): Handheld cutter that makes clean pipe cuts for repairs and replacements.
- Drain snake / hand auger: Flexible cable tool for reaching and breaking up deeper drain clogs.
- Plumber’s tape (Teflon tape): Thread seal tape for preventing leaks on threaded joints.
- Pliers / channel‑locks: Multi‑purpose gripping pliers for nuts, fittings, and holding parts.
- Hacksaw: For cutting metal or plastic when a pipe cutter isn’t available.
- Plumber’s putty and basic sealants: For sealing drain flanges and small fixture gaps.
This list doubles as a quick shopping checklist and sets the vocabulary we use in the sections that follow about starter‑kit specs and real‑world uses.
| Tool | Best-for | Estimated DIY Difficulty |
|---|---|---|
| Plunger (cup & flange) | Clearing sink and toilet clogs | Easy |
| Adjustable wrench (6–12″) | Fixture nuts, supply lines | Easy |
| Basin wrench | Tightening/removing faucet nuts | Moderate |
| Pipe wrench (10–18″) | Threaded metal pipe work | Moderate |
| Hand auger (15–25′) | Deeper drain clogs in sinks/showers | Moderate |
| Pipe cutter (PVC/copper) | Clean cuts for repair/replacement | Moderate |
| Plumber’s tape | Sealing threaded joints | Easy |
Which basic items belong in a home plumbing repair kit?
Your home kit should balance versatility and portability so you can reach under sinks or into utility closets. At minimum, include a 6–12″ adjustable wrench, channel‑lock pliers, a basin wrench, a medium pipe wrench, a 15–25′ hand auger, two plungers (cup for sinks, flange for toilets), a pipe cutter for PVC and copper, a hacksaw, plumber’s tape, plumber’s putty, safety gloves, and a small bucket. Practical specs to aim for: adjustable wrench that grips 1/2″–1″ nuts, hand auger with at least 15′ of cable, and a pipe cutter with a replaceable wheel. Store everything in a small case with labeled compartments so parts and spare auger cable stay organized and ready when you need them.
Shopping tip: choose corrosion‑resistant finishes and tools with replaceable wear parts. Jaws, cutting wheels, and auger cables wear out faster than handles — replaceable parts extend tool life and save money over time.
How do these tools solve everyday plumbing problems?
Each tool maps to common homeowner tasks: plungers and augers clear blockages; adjustable and basin wrenches tighten supply lines and faucet connections; pipe cutters and hacksaws remove damaged pipe sections; plumber’s tape and putty seal threads and drain flanges. For example, a slow sink drain often clears with a cup plunger and a hand auger in the trap; a dripping compression fitting usually needs a bit of tightening with an adjustable wrench and fresh plumber’s tape. Some DIY repairs are permanent when done correctly; others are temporary when corrosion or tree roots are involved. Knowing which tool fits which task helps you decide whether a fix will last or if pro help is needed.
Familiarity with common failure modes — worn washers, loose compression nuts, brittle seals — prepares you for the techniques covered next.
How to use key DIY plumbing tools safely and effectively
Good results depend on the right technique, appropriate safety gear, and matching the tool to the job. This section gives step‑by‑step guidance for the most common tasks: plunging, snaking drains, using wrenches without rounding nuts, and cutting pipes cleanly. Wear gloves and eye protection, support the workpiece when applying torque, and use steady pressure to avoid turning a small job into an emergency. Start with the plunger and auger instructions — unclogging is the most frequent homeowner repair and often fixes the problem without taking things apart.
Below are straightforward steps you can follow to get the job done correctly and safely.
- Check and isolate: Shut off the fixture’s water and place a bucket under the work area to catch leaks.
- Plunge properly: Build a seal, use steady thrusts, and keep enough water to maintain suction.
- Snake carefully: Feed the auger slowly, rotate to snag or break up debris, and withdraw steadily to avoid re‑depositing mess.
- Wrench best practices: Pull from the fixed‑jaw side of an adjustable wrench, don’t use cheater bars, and apply smooth pressure.
- Cutting pipes: Support the pipe, mark the line, use the correct cutter for the material, and deburr the edge after cutting.
Using these techniques reduces damage and sets you up for the more detailed plunging and snaking steps in the next subsection.
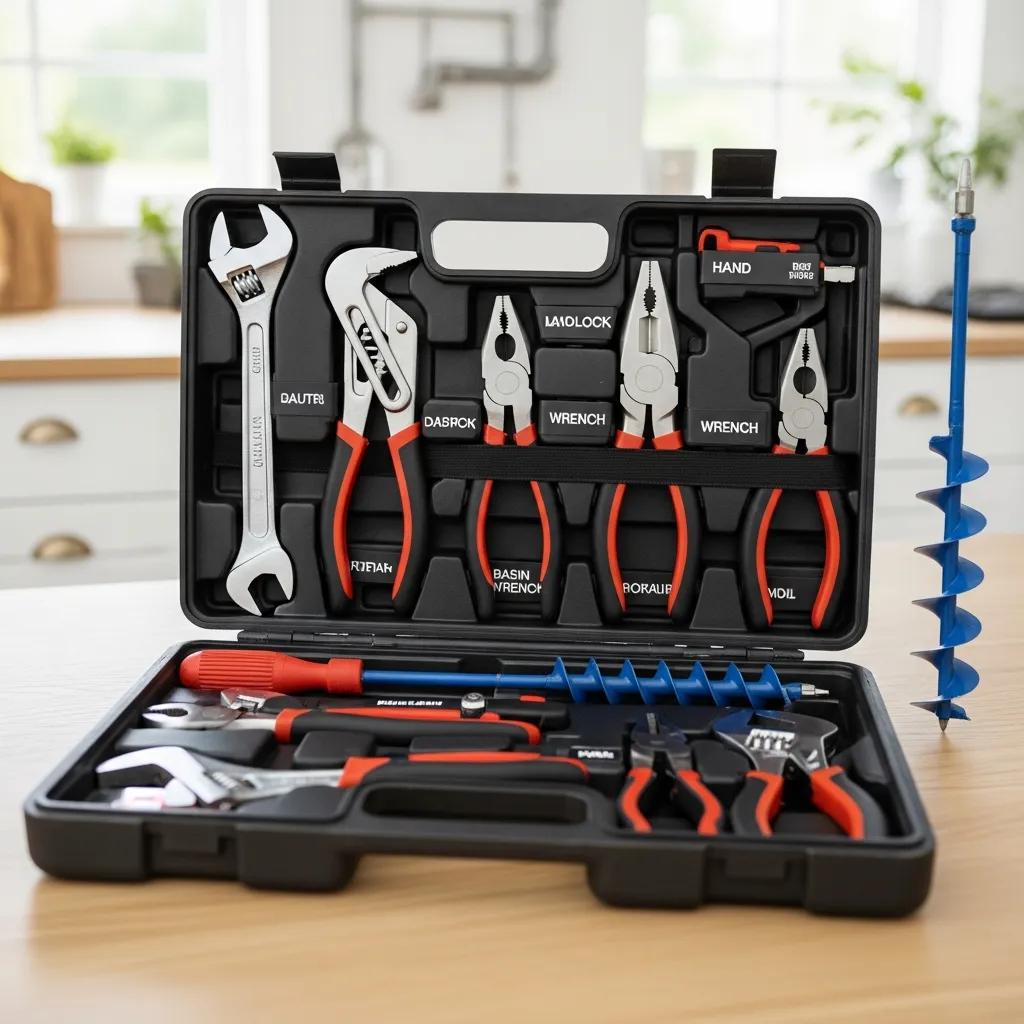
Proper technique for plungers and drain snakes
A plunger works by changing pressure to dislodge a clog. Use a flange plunger for toilets and a cup plunger for sinks. Fill the fixture so the plunger cup is covered, center the cup, and use steady, forceful plunges rather than quick jerks. After a few cycles, pull back to help debris clear. With a hand auger, feed the cable slowly, rotate the handle to move past traps and bends, and keep rotating while you withdraw to avoid kinking or leaving debris behind. Always clean and dry the auger after use to prevent corrosion and contamination. Common mistakes include plunging an empty basin, forcing an auger against hard resistance (a sign of a deeper problem), and neglecting to protect nearby surfaces — correct technique avoids these mistakes.
Practice on a noncritical fixture to build confidence. If plunging and snaking don’t work, the blockage may be deeper than a homeowner should attempt and it’s time to call a professional.
Safe use of wrenches and pipe cutters
Wrenches and cutters demand attention to leverage and alignment. Use the correctly sized wrench and apply force to the fixed jaw to avoid rounding nuts. Keep your wrist straight and work slowly with a basin wrench so the pivot head doesn’t strip the nut behind the sink. When cutting, support the pipe, score the line, turn the cutter evenly to make a clean groove, then deburr the inner and outer edges to ensure a good seal. Avoid over‑tightening compression fittings and never use an aggressive pipe wrench on soft metals — those mistakes can damage threads and force replacements. If something feels unusually stuck, stop and reassess before risking more damage.
These safety habits lead directly into choosing the right unclogging method, which we cover next.
Which tools work best for unclogging drains?
Pick the unclogging tool based on where the clog is, what fixture it’s in, and what’s causing it. Plungers, hand augers, and drum or electric augers serve different depths and conditions. Chemical cleaners can help with organic build‑up but carry risks. A simple decision path: use a cup or flange plunger for trap‑level clogs, a hand auger for deeper trap or drainline obstructions, and a drum or powered auger for mainline or stubborn blockages. When possible, choose enzymatic cleaners over caustic ones for regular maintenance — they’re gentler on pipes and the environment. The table below compares methods so you can pick the safest, most effective option.
| Method | Best-use-case | Pros / Cons |
|---|---|---|
| Cup/Flange Plunger | Sink or toilet trap-level clogs | Pros: quick, safe; Cons: limited depth |
| Hand auger (15–25′) | Deeper sink/shower clogs | Pros: manual control; Cons: limited reach |
| Drum / electric auger | Mainline or severe clogs | Pros: power and depth; Cons: risk of pipe damage if misused |
| Chemical cleaners (enzymatic/caustic) | Organic buildup in pipes | Pros: non‑mechanical; Cons: corrosive risk, environmental concern |
Use this quick comparison to match method to fixture and clog type. The next sections describe plunger and auger varieties and when chemicals might be appropriate.
Which plungers and drain snakes work best?
Choose a cup plunger for flat sinks and a flange plunger for toilets. An accordion plunger gives extra suction for toilets but is awkward for sinks. For augers, use a hand auger (15–25′) for sinks and showers and a drum or electric auger for mainline blockages. Match the auger cable diameter to the drain size to avoid jamming small traps. Feed the auger gently until you feel resistance, then rotate to break or retrieve the obstruction. Using the right tool for the fixture reduces the chance of damage and solves most household clogs without chemicals.
Knowing tool types and limits prepares you to choose between mechanical and chemical approaches in the next section.
When are chemical cleaners appropriate versus manual tools?
Enzymatic and caustic cleaners can dissolve organic build‑up like hair and grease, but they can also harm some pipe materials and pose safety hazards. Mechanical methods are preferable for physical blockages (objects, roots) or when pipe material is unknown. Use enzymatic cleaners for routine maintenance on slow drains and avoid caustic products on older metal pipes, pump seals, or certain PVC connections. If a chemical treatment doesn’t clear a clog after one proper application, stop and switch to mechanical methods or call a professional — mixing chemicals with mechanical clearing can be dangerous. When in doubt, reach for a hand auger or call a pro to minimize risk and protect downstream systems like septic tanks.
This guidance helps you build a toolkit that supports safe mechanical and limited chemical use at home.
How to build and care for your DIY plumbing toolkit
A reliable toolkit starts with durable tools that have replaceable parts, organized storage, and a simple maintenance routine to prevent rust and breakdowns. In addition to the essentials listed earlier, add emergency items like a shut‑off valve key, pipe repair tape, spare washers, and a small torch or heat gun if you plan to solder and have the experience. Keep auger cables clean, oil wrench pivots lightly, and store tools in a dry case to prevent rust. The table below offers recommended sizes and quick maintenance tips to help you assemble a practical starter kit.
| Tool | Recommended model/size | Maintenance tip |
|---|---|---|
| Adjustable wrench | 6–12″ single-piece | Wipe clean, apply light oil to slider |
| Hand auger | 15–25′ cable | Clean cable after use, lubricate coil |
| Basin wrench | Long-handle with pivot head | Inspect pivot, lubricate joint |
| Pipe cutter | Adjustable for PVC/copper | Replace cutting wheel when dull |
| Plunger set | Cup + flange | Rinse and dry after use, store separated |
| Plumber’s tape | Standard Teflon | Keep roll sealed to prevent dirt |
This starter inventory gives practical recommendations for selecting and maintaining tools. The following section prioritizes must‑haves and storage tips to keep your kit ready for years.
What must-haves complete a practical home plumbing kit?
A complete kit focuses on common failure points: plungers for clogs, an adjustable wrench and channel‑lock pliers for fittings, a basin wrench for faucets, a pipe cutter and hacksaw for repairs, a hand auger for deeper clogs, plumber’s tape, and a small stock of washers and O‑rings. Add a shut‑off valve tool and spare compression rings for quick emergency work. Aim for corrosion‑resistant finishes, comfortable grips, and replaceable wear parts — these traits increase longevity and performance. A mid‑range set usually performs better than the cheapest option when you need extra torque or reach on stubborn fittings.
The next subsection covers storage and care steps that keep tools reliable over time.
How should you store and care for plumbing tools?
Store tools in a dry, ventilated toolbox or on a pegboard to keep them away from moisture. After use, rinse and dry auger cables and plungers, then apply a light coat of machine oil to metal parts to slow corrosion. Keep consumables like plumber’s tape and spare washers in labeled compartments so replacements are easy to find. Inspect tools every three months for cracked handles, dull cutting wheels, or frayed auger cables, and replace worn components before they fail on the job. A simple routine — clean after use, oil monthly, inspect quarterly — keeps tools ready and lowers long‑term costs.
Well‑kept tools reduce the chance that a small job becomes a major one — the moment many homeowners call for professional help.
When should homeowners call a professional instead of DIY?
Call a professional when the risk, scope, or complexity exceeds safe DIY ability. Red flags include sewage backups, major leaks you can’t isolate, any smell of gas near plumbing appliances, missing shut‑off valves, or repeated failures after DIY attempts. Pros handle slab leaks, main sewer line blockages, water heater replacement, complex leak detection, and jobs that threaten structure or health — many of these require special equipment, permits, or trained technicians. Time guidance: call immediately for sewage, gas, or uncontrolled flooding; same‑day for large leaks or major fixture failure; schedule service for persistent clogs or ongoing leaks. In Grosse Pointe, Frost & Kretsch Plumbing offers local emergency response, advanced drain cleaning, and leak detection with licensed, insured technicians and clear estimates.
Which plumbing problems are too complex for DIY?
Leave these to the pros: slab leaks under concrete, main sewer line failures, widespread corrosion, water heater replacement, and any gas‑line work or issues that risk contamination or structural damage. DIY attempts on these problems can make things worse, void warranties, or create health hazards. Professionals use specialized tools like video pipe inspection, electronic leak locators, and heavy‑duty augers or excavation equipment, and they ensure work meets code. Recognizing when a job is out of scope saves time and prevents costly downstream repairs.
How Frost & Kretsch Plumbing can help with emergencies and advanced repairs
Frost & Kretsch Plumbing handles the jobs that go beyond DIY: emergency response, professional drain cleaning, leak detection, and larger residential repairs. Their local technicians know the area’s common plumbing issues and bring licensed, insured service with transparent estimates. If you try the DIY steps in this guide and the problem persists, calling experienced professionals will reduce risk and restore your system safely and quickly. When red flags like sewage backup or persistent mainline clogs appear, professional help is the smartest next step to protect your home and health.
What preventative maintenance helps avoid plumbing problems?
Regular maintenance catches small issues before they turn into emergencies. Simple routines — inspecting supply lines, testing shut‑off valves, monthly trap cleaning, and watching the water meter for silent leaks — keep systems healthy. Consider small investments like a smart leak detector or periodic professional drain cleanings to avoid costly failures. The short checklist below gives a seasonal cadence you can follow with the tools in your kit to reduce emergencies and extend fixture life.
- Monthly: Run hot water and flush drains, check visible supply‑line fittings, and test fixture shut‑offs.
- Quarterly: Inspect exposed piping for corrosion, clean pop‑up drains, and lubricate valve stems if needed.
- Annually: Do a full visual system check, consider professional drain cleaning if drains are slow, and test water heater pressure relief valves.
- As‑needed: Replace worn washers, O‑rings, or rewrap threaded joints when minor drips appear.
Following this cadence cuts the chance of sudden failures and ties directly to regular use of the tools described above.
How does regular use of DIY tools prevent problems?
Routine light maintenance — monthly trap cleaning with a hand auger, occasional plunging of slow drains, and tightening loose fittings before they leak — keeps water flowing and catches small faults early. These habits reduce emergency calls, extend fixture life, and lower long‑term repair costs. Regular use also helps you learn how your system normally behaves, so you can spot anomalies sooner. Treating tools as preventative instruments, not just emergency gear, makes a real difference.
What simple habits reduce plumbing emergencies?
Everyday practices go a long way: don’t flush wipes or grease, use drain strainers, run cold water with the garbage disposal, and make sure everyone knows where shut‑off valves are. Label valves for quick isolation, keep a basic emergency kit with a shut‑off key and pipe repair tape, and teach household members simple stop‑gap steps for leaks. Ignoring these basics raises the risk of backups, frozen bursts, and appliance damage; simple, consistent habits significantly lower those chances. Combined with the toolkit and maintenance checklist above, these practices keep most plumbing problems from becoming emergencies.
Frequently Asked Questions
1. What should I do if my DIY plumbing repair doesn't work?
Stop and reassess. If problems persist — like ongoing leaks, recurring clogs, or any sign of sewage — don’t keep trying risky fixes. Call a professional plumber. They can diagnose hidden issues and fix them safely, ensuring work meets local code and protecting your home.
2. How can I prevent plumbing emergencies in my home?
Regular maintenance and smart habits: inspect for leaks, use drain strainers, avoid flushing inappropriate items, and run hot water down drains monthly. Know where shut‑off valves are and keep an emergency kit handy so you can act fast on small problems.
3. Are there any plumbing tasks I should never try myself?
Yes. Leave slab leaks, main sewer line repairs, water heater replacements, and gas‑line work to licensed professionals. These jobs carry safety and code implications that make professional service the right choice.
4. How often should I perform preventative maintenance?
Do quick checks monthly, inspect exposed pipes quarterly, and run a full visual system review annually. Schedule professional drain cleaning if you notice persistent slow drains. Regular attention prevents most costly failures.
5. What are signs I need to call a plumber immediately?
Call right away for sewage backups, major uncontrolled leaks, the smell of gas near plumbing appliances, or flooding you can’t isolate. These are urgent safety and health risks that need professional response.
6. How can I choose the right plumbing tools for DIY repairs?
Start with the essentials: plungers, wrenches, pipe cutter, and a hand auger. Match tool size to your fixtures, choose corrosion‑resistant materials, and pick tools with replaceable wear parts. A compact, organized kit makes emergency response simple.
7. What are the benefits of using DIY plumbing tools regularly?
Regular use keeps systems flowing, catches small problems early, and lowers repair costs. It also builds your confidence and familiarity with your home’s plumbing so you can act quickly when issues arise.
Conclusion
Building a basic plumbing toolkit and learning a few safe techniques lets you handle most minor household issues quickly and with confidence. Regular maintenance and sensible habits prevent many emergencies, and when a job is beyond your comfort level, Frost & Kretsch Plumbing is available in Grosse Pointe for emergency and advanced repairs. Start with the essentials, practice safe techniques, and call a pro when you need to protect your home. Begin assembling your kit today and take control of routine plumbing care.